The purpose of capturing breathtaking aerial footage is to share it with others, as there’s little point in creating content that isn’t meant to be seen or appreciated by a wider audience.

Live streaming has become an increasingly popular way for people to share their experiences and connect with others in real time.
DJI drones offer an incredible opportunity for aerial live streaming, allowing you to share stunning views and capture unique perspectives that were previously impossible to achieve.
In this article, I’ll walk you through the steps to live stream with your DJI drone on Facebook.
To help, we’ve identified and reviewed the best drone courses for beginners and professionals.
Step 1: Check your equipment
Before you start live streaming with your DJI drone, you must ensure your equipment is up to task.
First, check that your drone is fully charged and the camera functions properly.
You also need to ensure you have a stable internet connection. It’s recommended to have at least a 4G network or a strong Wi-Fi signal.
Step 2: Download the DJI GO 4 app
The DJI GO 4 app is essential for live streaming with your DJI drone. You can download the app for free from the App Store or Google Play Store.
Once downloaded, connect your phone to your DJI drone using the appropriate cable.
Ensure your phone is connected to the internet and open the app. The app will prompt you to create an account if you don’t already have one.
Step 3: Connect to Facebook
Once you have the DJI GO 4 app installed and connected to your drone, the next step is to connect to Facebook.


Open the app and navigate to the live streaming function. The app will prompt you to sign in to your Facebook account.
You will need to give DJI GO 4 app permission to access your Facebook account.


Step 4: Set up your live stream
Now that you’re connected to Facebook, you can set up your live stream. You can choose to broadcast to your personal profile, business page, or group.
You can also add a title and description to your live stream, which will help viewers understand what you’re broadcasting.
You can further choose to share your location if you want viewers to know where you’re broadcasting from.
Here’s how:
- Open the DJI GO 4 app and tap on the “Camera” icon at the screen’s bottom left corner.
- Ensure your drone is in the air and you have a stable internet connection.
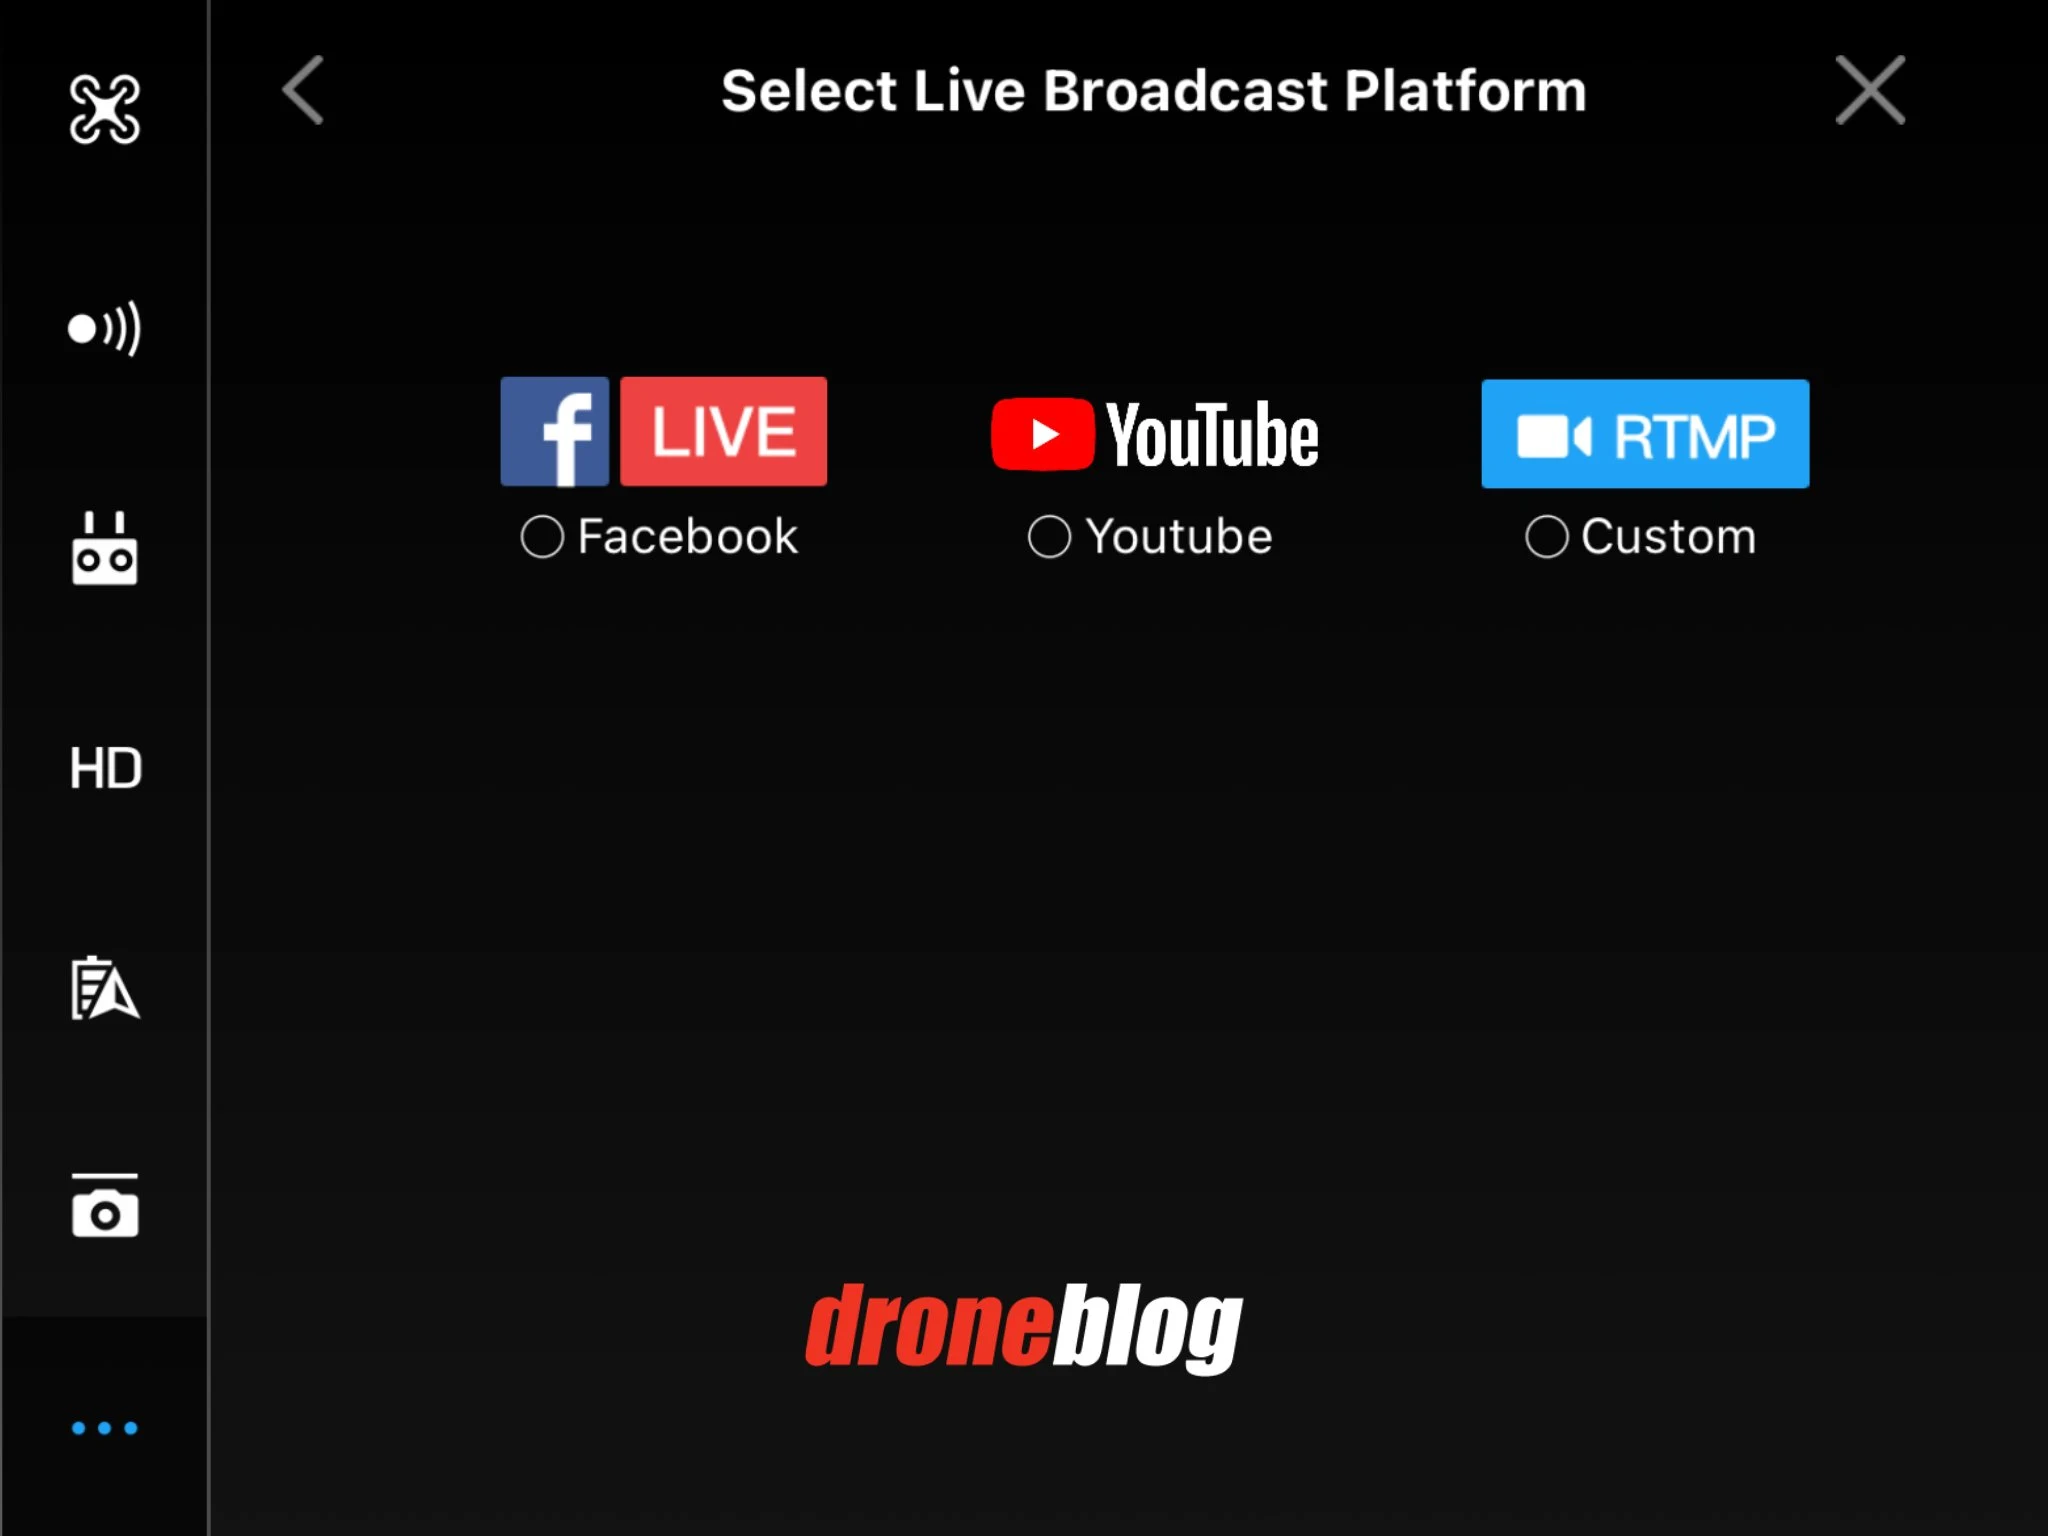
- Tap on the “Live” icon at the bottom of the screen.
- Tap on “Facebook Live” and choose your preferred settings, such as privacy settings and video resolution.
- Enter a description for your live stream, and select the audience you want to share the stream with.
- Tap on “Start Live Stream” to begin streaming to Facebook.
Step 5: Three, two, one, go!
Once you’ve set up your live stream, it’s time to start broadcasting. Ensure your drone is stable and you have a clear view of your subject.
Once you’re ready to start broadcasting, press the “Start Live Stream” button in the DJI GO 4 app.
You’ll see a countdown timer to give you time to get into position before the live stream starts.
Once the countdown timer reaches zero, you’ll be live on Facebook.
Step 6: Monitor your live stream
As you’re broadcasting, you must monitor your live stream to ensure everything is working correctly.
You can do this by watching your DJI GO 4 app, which will show you the status of your live stream.
You can also view the comments and reactions from viewers on the Facebook app on your phone or computer.
» MORE: What Does a Drone Look Like from the Ground?
Step 7: End your live stream
When you’re ready to end your live stream, simply press the “End Live Stream” button in the DJI GO 4 app.
Once the live stream has ended, it will be saved to your Facebook page, where viewers can watch it later.
You can also edit and share the video on other social media platforms.


All courses offered by Pilot Institute are taught by remote pilots, flight instructors, FAA commercial pilots, and other certified professionals.
Tips for successful live streaming
Now that you know how to live stream with your DJI drone on Facebook, here are some tips to make your live stream successful.
1. Plan ahead
Planning ahead is essential for a successful live stream. You need to consider where you’ll be broadcasting from, what you’ll be broadcasting, and who your audience is.
It’s also important to ensure that you have a stable internet connection and enough battery life on your drone.
2. Use the right settings
The DJI GO 4 app allows you to adjust several settings that can affect the quality of your live stream. You can set the resolution, frame rate, and bitrate to optimize the quality of your broadcast.
Finding the right balance between quality and stability is important, as a high-quality stream with a poor connection will result in buffering and dropped frames.
3. Choose the right location
Choosing the right location for your live stream is crucial. You need to find a place that offers a good view of your subject, has a stable internet connection, and is safe for your drone to fly.
It’s also important to consider the lighting conditions and any potential obstacles that could interfere with your broadcast.
4. Engage with your audience
Engaging with your audience is key to a successful live stream.
Respond to comments and questions, and thank viewers for tuning in. You can also ask viewers for suggestions on what to film or where to fly your drone next.
This will help create a sense of community and encourage viewers to share your live stream with others.
5. Be creative
The beauty of live streaming with a DJI drone is that it allows you to capture unique and stunning perspectives.
Experiment with different camera angles and movements to create a visually appealing broadcast. You can also add music or sound effects to enhance the viewing experience.
6. Practice makes perfect
Live streaming with a DJI drone can take some practice to get right. Take the time to familiarize yourself with the DJI GO 4 app and the best settings for your broadcast.
Practice flying your drone in different locations and lighting conditions to get a feel for what works best.


Become an FAA-certified drone pilot to fly for commercial use. Pass your FAA drone exam on your first try or your money back.
Live streaming with your DJI drone on Facebook is an incredible way to share your experiences and connect with others.
With the right equipment, planning, and preparation, you can create stunning and engaging live streams that will captivate your audience.
Remember to plan ahead, use the right settings, choose a good location, engage with your audience, be creative, and practice to perfect your live streaming skills.
With these tips in mind, you’re ready to take your live-streaming game to the next level!