
This year has been quite a year for new drones. DJI has been releasing drones faster than they can be reviewed and tested, it seems.
Perhaps you have or will be receiving a brand-new drone in the near future.
If you are new to drones and have just received a brand new Mini 4 Pro, we will be going through the steps needed to get most new, first-time drone owners up and flying.
In this article and video tutorial we will be considering the following:
- What’s in the various combos
- Charging all of the batteries
- Inserting SD cards
- Downloading, Installing, and setting up the DJI Fly Software
- Preparing the drone for flight
Hopefully, after this guide, you, as a new Mini 4 Pro owner, will have the tools needed to get up in the air safely and quickly.

To help, we’ve identified and reviewed the best drone courses for beginners and professionals.

Pricing
The Mini 4 Pro comes in the following Packages:
Mini 4 Pro (DJI RC-N2)

- 4K HDR Video Camera
- Under 0.549lbs/249g
- 34 Mins Flight Time
- 20 km Max Video Transmission Distance
- Omnidirectional Vision Sensing
Includes:
- DJI Mini 4 Pro
- DJI RC-N2 Remote Controller
- 1 x Intelligent Flight Battery (Standard)
- USB-C Cable
- Android and iOS Control Cables
- Front Sensor and Gimbal Guard
- Propeller Holder
- 2 Sets of Spare Props and 6 Screws
- Screw Driver
Mini 4 Pro (DJI RC 2)

- 4K HDR Video Camera
- Under 0.549lbs/249g
- 34 Mins Flight Time
- 20 km Max Video Transmission Distance
- Omnidirectional Vision Sensing
Includes:
- DJI Mini 4 Pro
- DJI RC 2 Remote Controller
- 1 x Intelligent Flight Battery (Standard)
- USB-C Cable
- Android and iOS Control Cables
- Front Sensor and Gimbal Guard
- Propeller Holder
- 2 Sets of Spare Props and 6 Screws
- Screw Driver
Mini 4 Pro Fly More Combo (DJI RC 2/Standard Battery)

- 4K HDR Video Camera
- Under 0.549lbs/249g
- 2 Extra Batteries for 34-Min Flight Time
Includes:
- DJI Mini 4 Pro
- DJI RC 2 Remote Controller
- 3 x Intelligent Flight Battery (Standard)
- Battery Charging Hub
- Carrying Bag
- USB-C Cable
- USB-C to USB-C PD Cable
- Android and iOS Control Cables
- Front Sensor and Gimbal Guard
- Propeller Holder
- 6 Sets of Spare Props and 18 Screws
- Screw Driver
Mini 4 Pro Fly More Combo Plus (DJI RC 2/Plus Battery)

- 4K HDR Video Camera
- 2 Extra Intelligent Flight Batteries Plus for 45-Min Flight Time
- Omnidirectional Obstacle Avoidance
Includes:
- DJI Mini 4 Pro
- DJI RC 2 Remote Controller
- 3 x Intelligent Flight Battery (Plus)
- Battery Charging Hub
- Carrying Bag
- USB-C Cable
- USB-C to USB-C PD Cable
- Android and iOS Control Cables
- Front Sensor and Gimbal Guard
- Propeller Holder
- 6 Sets of Spare Props and 18 Screws
- Screw Driver
Charging the Batteries
Although new drone day is exciting, and we want to get out and fly immediately, the first thing that will need to be done, is to charge all of the batteries that come in the various packages and combos, including the remote controller batteries.
RC-N2 and DJI RC 2 Controllers


Although the remote controller might have approximately half power when initially opened, it is important to fully charge the remote controller.
As is the case with previous DJI Mini drones, including the Mini 3 Pro, the Mini 4 Pro does not include a power adaptor.
For the quickest charging speeds, it is recommended you purchase a 30-watt charger.
With a 30-watt charger, you will be able to charge a controller through the battery hub, as well as the drone’s batteries.
You can either purchase DJI’s branded charger or any 3rd party charger you may be comfortable with.
If you decide to go with a single 30-watt charger, instead of one with multiple ports, when you plug the 3-battery charging hub up to the 30-watt charger, then use a 2nd USB-C cable to connect the remote controller, the Mini 4 Pro batteries will always charge first.
Only after the batteries have fully charged will the remote controller begin to charge.
Tip: If you do not have batteries in the hub, then the RC will charge normally. To get around this, it is advisable to either have a 2nd charger, specifically for the RC, or a multiport charger.
To charge the standard RC-N2 controller, plug the included USB-C cable into the bottom of the RC. The LED indicator lights will begin to blink, signifying the remote controller is charging.
To charge the DJI RC 2, with the 5″ integrated screen, the USB-C charging port is located in the port to the right of the Micro SD card slot.
Plug the USB-C cable in and the controller will begin charging.
» MORE: 27 Best Drone Accessories (I Can’t Live Without)
Mini 4 Pro Batteries


The Mini 4 Pro uses the same Standard and Plus battery options as the Mini 3 and Mini 3 Pro.
The Mini 4 Pro gets approximately 34 minutes of flight time with the Standard battery option and 45 minutes with the Plus battery.
The difference in flight times between the Mini 3 Pro and the Mini 4 Pro may have to do with the extra processing and power needed for the omnidirectional obstacle avoidance system in the new Mini 4 Pro.
With the Mini 4 Pro, as with the previous Mini 3 Pro, there are 2 ways in which to charge the batteries.
The 1st Method: This is for those who purchased the Mini 4 Pro with only one drone battery, having not opted for the Flymore combo.
The Mini 4 Pro battery can be charged while installed in the Mini 4 Pro.
Locate the USB-C charging port in the rear of the drone. Insert the provided UBS-C cable into the Mini 4 Pro and then into a 30-watt charger. The battery will begin charging.


The 2nd Method: If you purchased one of the Flymore combos, you will be able to charge all 3 batteries, in succession, not simultaneously.
To do this, insert the batteries into the Flymore combos charging hub and connect the included USB-C cable to a 30-watt charger (not included).
The batteries will then charge individually, one after another.


If you have a fly more combo and also purchased an additional battery (as I have), then you can charge 3 batteries in the charging hub and use a separate USB-C and 30-watt charger to charge the additional battery in the Mini 4 Pro itself.
I use the charger that I have specifically for the DJI RC to charge my 4th battery.
» MORE: Does DJI Mini 3 Pro Come with a Charger? (See Our Recommendation)
SD Cards
While the Mini 4 Pro does have 2GB of internal storage, whether you have decided to get the standard Mini 4 Pro kit with the RC-N2 controller, or with the DJI RC 2, you’ll want to purchase an SD card if you’d like to record lots of videos or photos.
If you purchased the DJI RC 2 kit, there is also an SD card slot in the remote controller. This is used for screen recording.
If you don’t do screen recording, however, you can store an SD Card in the DJI RC 2 as a backup, just in case the Mini 4 Pro’s SD card is left in a computer at home.
To insert an SD card into the Mini 4 Pro:
With the back of the Mini 4 Pro facing you, insert the SD card into the SD card slot (to the right of the USB-C port), with the gold pins facing upwards.
Using a thumb or fingernail will aid in getting the card in.
Just beware that the SD card slot is spring-loaded. If your nail slips, it could cause the SD card to fly out of the slot.


To insert an SD card into the DJI RC 2:
With the bottom of the DJI RC 2 facing you, insert the SD card into the SD card slot (to the left of the USB-C charging port) with the gold pins facing downwards.
Like with the Mini 4 Pro, the DJI RC 2 SD card slot is likewise spring-loaded.


Below is a list, direct from DJI, of recommended SD cards:
- SanDisk Extreme PRO 32GB V30 U3 A1 microSDHC
- Lexar 1066x 64GB V30 U3 A2 microSDXC
- Lexar 1066x 128GB V30 U3 A2 microSDXC
- Lexar 1066x 256GB V30 U3 A2 microSDXC
- Lexar 1066x 512GB V30 U3 A2 microSDXC
- Kingston Canvas GO! Plus 64GB V30 U3 A2 microSDXC
- Kingston Canvas GO! Plus 128GB V30 U3 A2 microSDXC
- Kingston Canvas React Plus 64GB V90 U3 A1 microSDXC
- Kingston Canvas React Plus 128GB V90 U3 A1 microSDXC
- Kingston Canvas React Plus 256GB V90 U3 A1 microSDXC
- Samsung EVO Plus 512GB V30 U3 A2 microSDXC
» MORE: How to Format SD Cards in DJI Drones (Quick Steps with Photos)
Flight Software – DJI Fly
Aside from ensuring all batteries are charged, to fly your Mini 4 Pro, you will need to use DJI flight software.
Flight software is an app used by either a smartphone or electronic device and connected to your remote controller, which enables the Mini 4 Pro and remote controller to communicate, essential for flight control.
The software that works for the Mini 4 Pro is the DJI Fly app. If you have a DJI RC 2 combo, the DJI Fly app is pre-loaded on the remote controller.
If you are using a separate electronic device with the RC-N2 controller, you’ll need to download the DJI Fly software.
Where to Download DJI Fly
If you are using either an Android or iOS phone or tablet, the links to download the DJI Fly app are as follows:
Additionally, from your smartphone or electronic device, you can do a Google Search for “DJI Download Center”.
In the results, choose DJI Fly and you will be brought to the software downloads page.
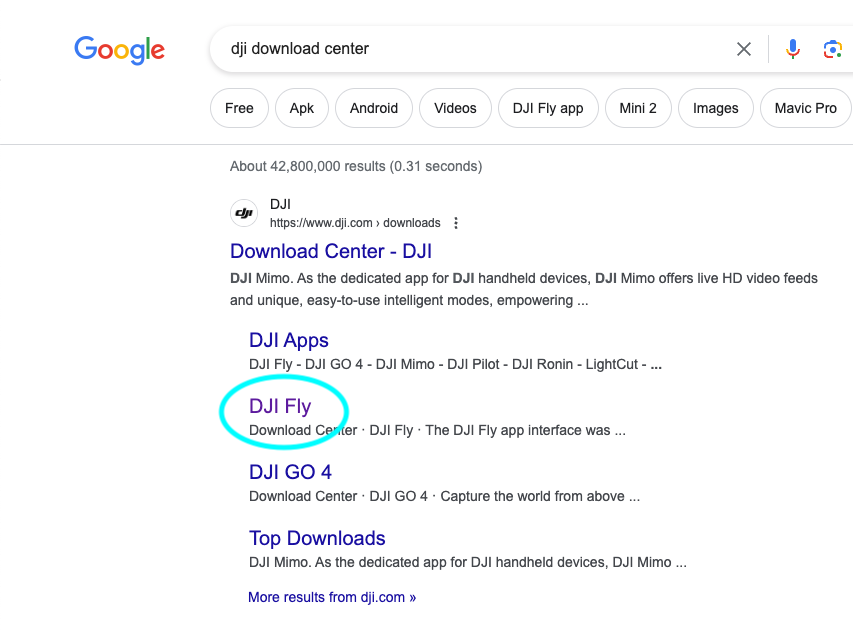
Note: the DJI Fly app for Android is only available online at the link above, and is no longer available in the Google Play store, whereas the iOS version for Apple devices is accessible via the App Store.
Setting up your DJI Account
Now that you have the DJI Fly app installed, it is time to set up your DJI Account.
You can either do so from within the app on your cellphone, or using the DJI RC 2.
If you have a DJI RC 2:
STEP 1: Turn on the RC by pressing once on the power button, then immediately press and hold the power button.
After the DJI splash screen appears, you should be brought to the main home screen.
You’ll need to connect to WiFi if setting up a DJI account through the DJI RC 2.
STEP 2: To turn on WiFi and connect to a network, double-swipe down from the top of the DJI RC 2 screen.
This will bring up a screen with a notification window on the left side, and a setting window to the right.
STEP 3: Press and hold the WiFi icon, as would be done on an Android or Apple phone. This will bring you to the Network Select screen.
STEP 4: Select your network and input the WiFi password if there is one.
Exit out of the screens back to the main screen and follow the steps below for setting up a profile if you have an RC-N2.
» MORE: DJI App Not Working? (Ultimate Troubleshooting Guide)
If you have an RC-N2
STEP 1: Without being connected to the RC-N2, from a cellphone or smart device launch the DJI Fly app and go into Profile .


STEP 2: Once in the Profile Screen, go to Log In.


STEP 3: Input the phone or email you would like to register with and be sure to check off the “I have read” section at the bottom.


STEP 4: Create your DJI Account by setting up a password for the email address you are using to log in to your DJI Account.


STEP 5: Enter the Captcha info and submit.


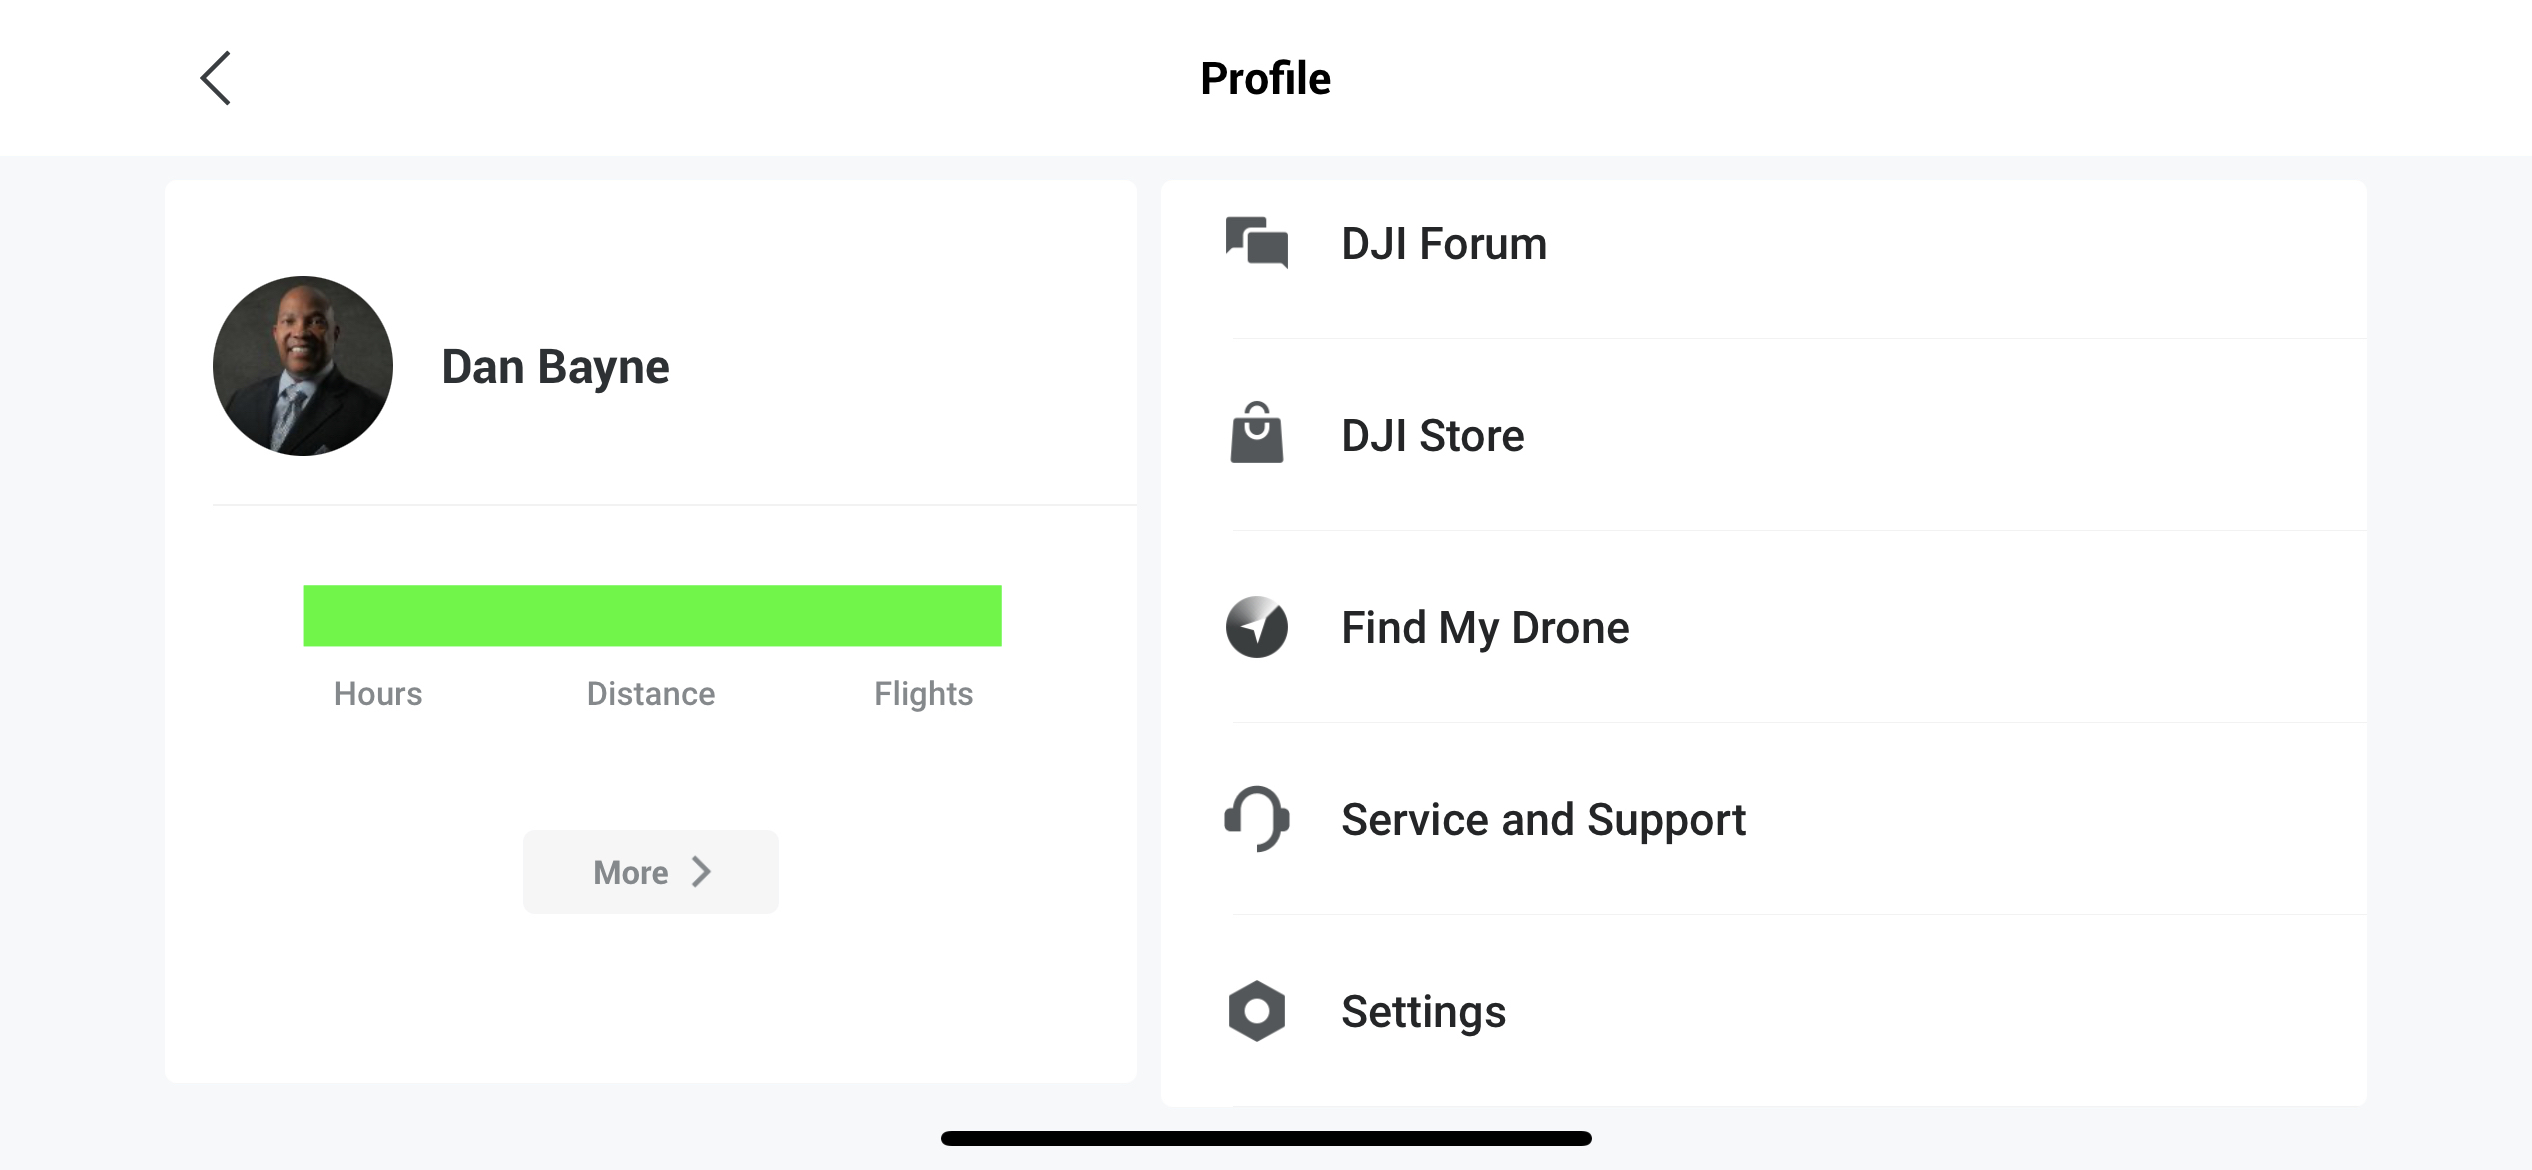
You’ll now be brought to the main profile page. You will see you have been set up as a generic DJI User.


STEP 6: To change your name and profile picture, tap your current djiuser_ name (this will bring you to the Profile details page, and you can change your DJI username to whatever you’d like, as well as upload a profile picture.

» MORE: DJI Mini 3 App (Read This Before Downloading)
Navigating DJI Fly
It’s now time to go into the DJI Fly app and get familiar with flying for the first time.
Connecting to the Fly App
With the RC-N2 Controller:
- STEP 1: If you are still in the Fly app, Exit the app. Connect your smartphone to your RC-N2 controller, as seen below.
- STEP 2: Open the DJI Fly app and turn on the RC-N2. To power on the controller, press the power button once, then long-press-hold until the RC makes a power-on signal. The lights will also flash.
- Step 3: First, unfold the arms and legs of the Mini 4 Pro and remove the gimbal cover. Turn on the Mini 4 Pro by pressing the power button once, then press and hold the power button and the Mini 4 Pro will turn on.
With the DJI RC 2 Controller:
If you created your DJI Profile with your DJI RC 2 and the RC is already on, turn on the Mini 4 Pro.
First, unfold the arms and legs of the Mini 4 Pro and remove the gimbal cover. Next, press the power button once, then press and hold the power button and the Mini 4 Pro will turn on.
» MORE: DJI Mini 3 / Mini 3 Pro App (Read This Before Downloading)
The Home Screen/Flight View
The main screen within the DJI Fly app houses all the important flight information you will need for a flight.
At a glance, you can see (along the top):
- Aircraft Battery percentage – flight time remaining
- RC (Remote Control) signal strength
- Obstacle Avoidance mode – whether it is off, set to bypass, or hover
- Number of locked satellites (it is best to fly after 7-12 satellites have been locked)


If you press the battery percentage icon, while in flight, you are given more detailed information regarding:
- How many minutes until RTH (return to home)
- How many minutes until the drone force lands
- How many minutes until the batteries are completely depleted


At the bottom of the app, you’ll see the following:
- How fast you are flying
- How far out the drone is from your current position
- How high the drone currently is AGL (above ground level)
- Drone positioning (Map)


By tapping the Map icon (bottom left – small up-arrow), you can get into 3 different Map views:
- Radar


- Small Map view


- Large Map view