Like the DJI Mini 3 Pro, the Mini 4 Pro takes great 12 MP and 48 MP photos and excellent 4k video.
With the vertical shooting capabilities, sharing content to Social Media sites is easier than ever.
For those who need varying sizes of storage for their Mini 4 Pro, or would like to take screenshots or screen recordings of their DJI RC 2, the Mini 4 Pro has you covered.
This article and the included YouTube video are a step-by-step tutorial walking through inserting, ejecting, and formatting the micro-SD card for both the Mini 4 Pro drone and the DJ RC 2.
To help, we’ve identified and reviewed the best drone courses for beginners and professionals.
Inserting the Micro-SD Card (Mini 4 Pro)
As DJI drones progress and improve over time, they can accommodate larger-capacity SD cards.
It wasn’t too long ago when many DJI drones could only read cards that had a 64 GB maximum. The Mini 4 Pro can store photos and videos on SD cards up to 512 GB.
» MORE: Best SD Cards for DJI Mini 4 Pro
To insert these larger capacity cards into the Mini 4 Pro:
STEP 1: Make sure the Mini 4 Pro is powered off.
While holding the Mini 4 Pro in one hand, carefully insert the SD card into the Mini 4 Pro SD card slot with the gold pin set pointed up (towards you).
Do not push the card in all the way just yet, as it will most likely fly out across the room.

STEP 2: While the SD card is in the slot, using your fingernail at a slight angle, push the SD card in until it makes an audible “click.”

Because the SD card slot is spring loaded, if you don’t press the SD card in with a nail at a slight angle, your finger could slip, causing the card to eject and fly away from you.
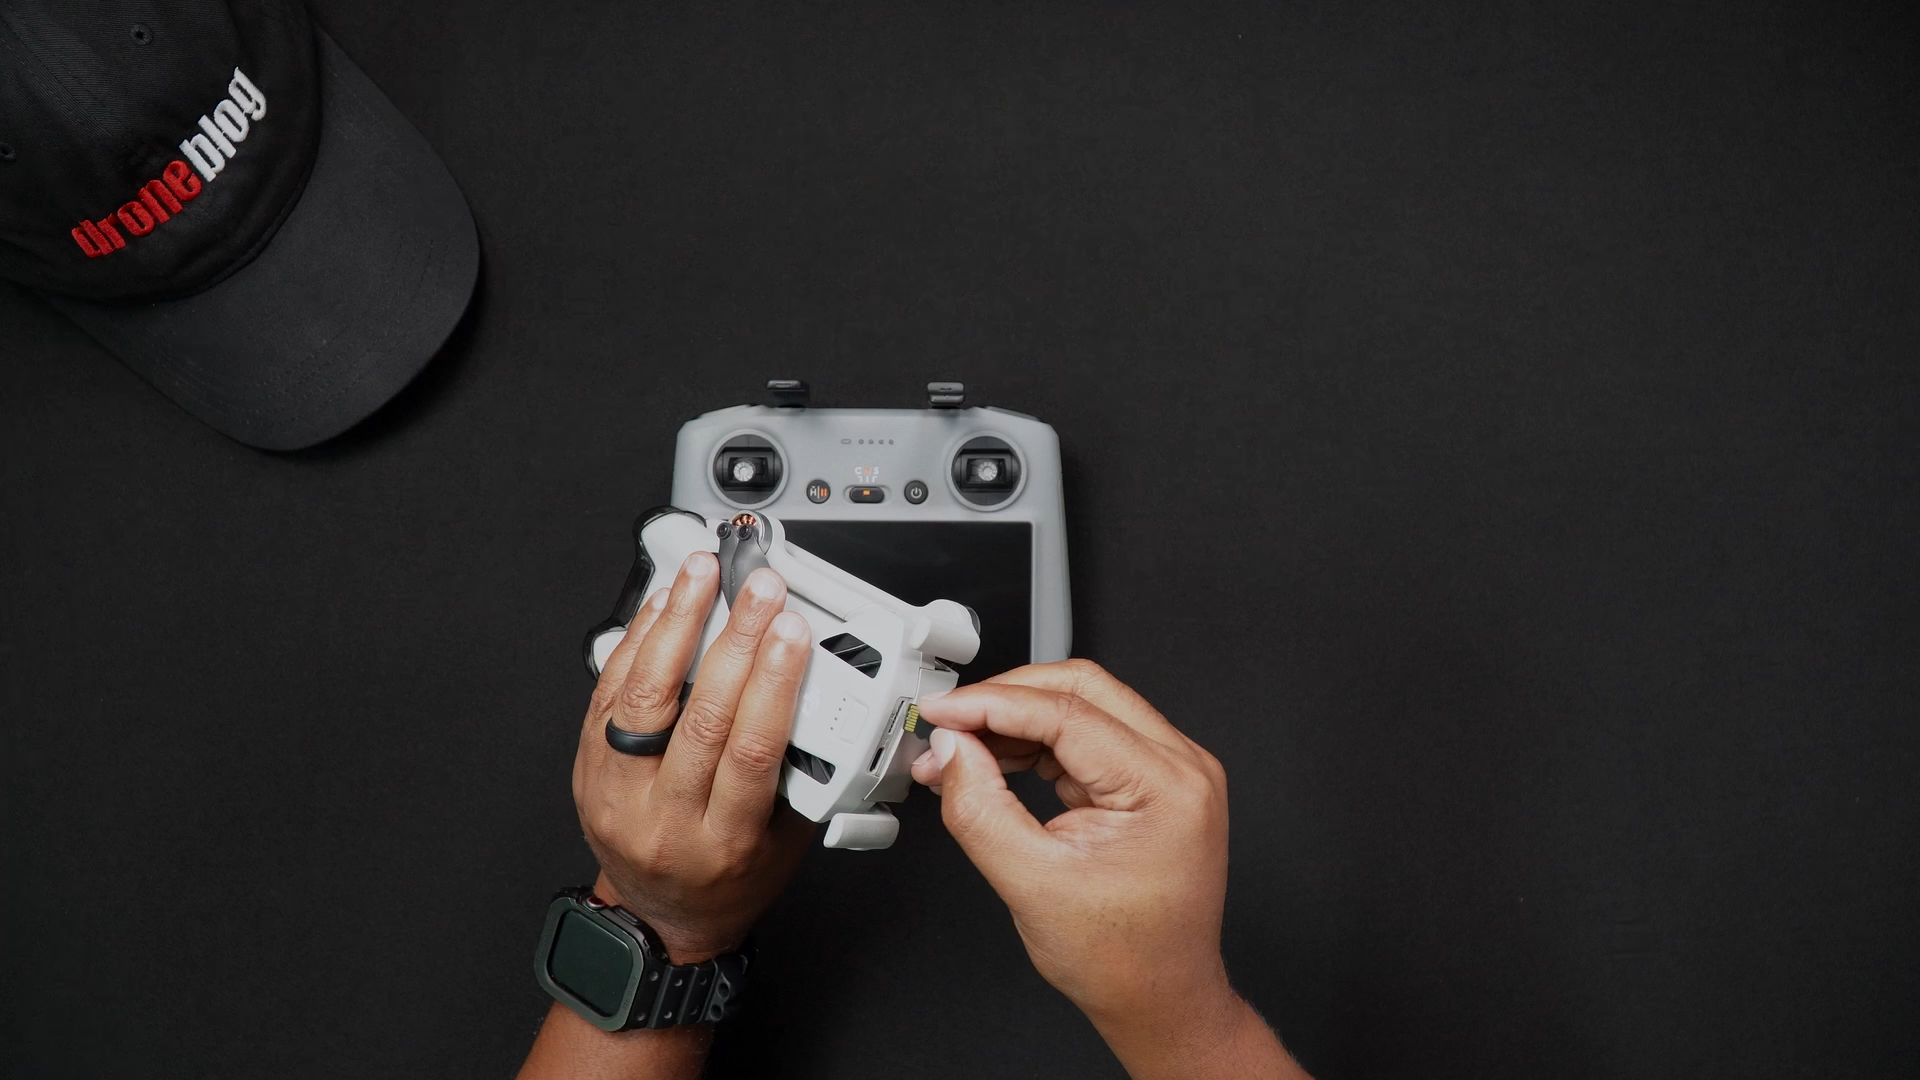
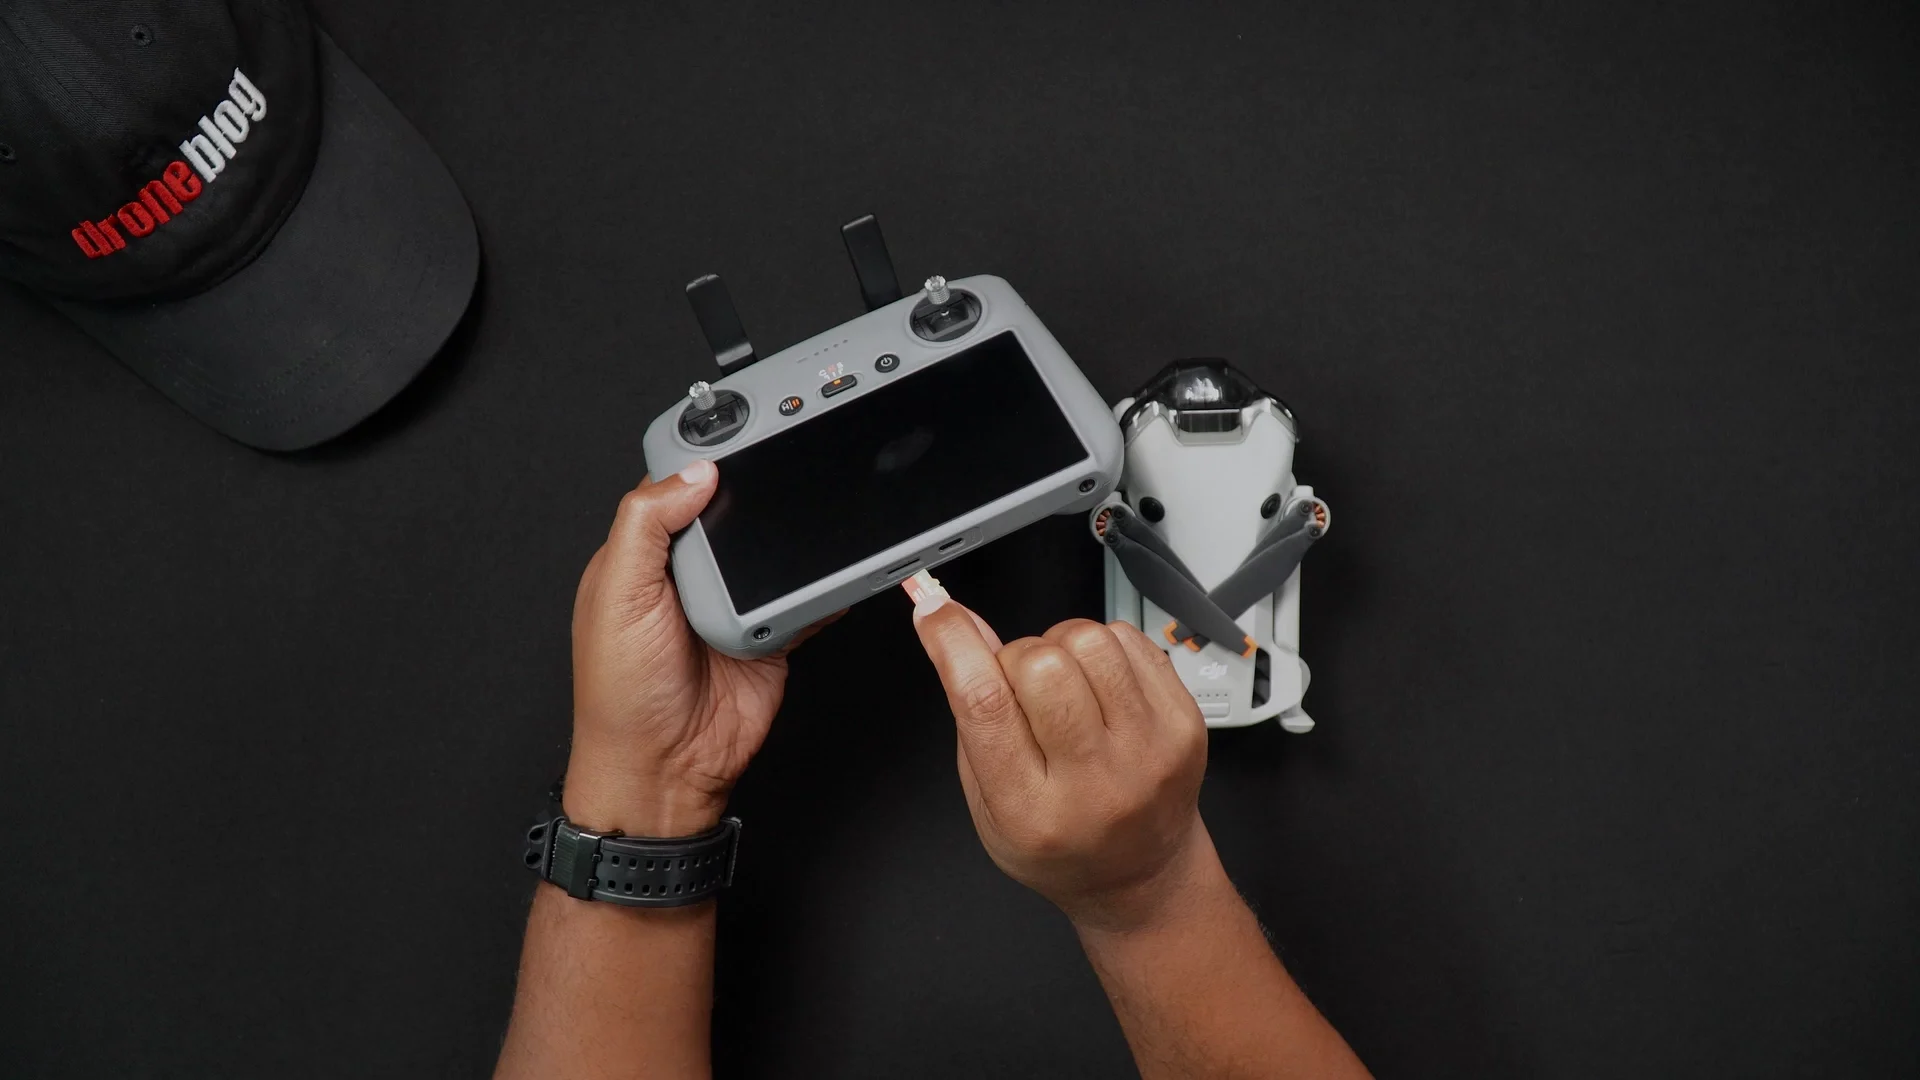
Inserting the Micro-SD Card (DJI RC 2)
If you own the combo with the DJI RC 2, you’ll see that there is an SD card slot in the remote controller as well.
The SD card on the DJI RC 2 is currently used for storing screenshots and screen recording clips. Time will tell if DJI adds more items that can be saved to the SD card.
To insert an SD card into the DJI RC 2:
STEP 1: With the DJI RC 2 powered off, partially insert the SD card into the DJI RC 2 SD card slot, this time with the gold pin set pointed down or away from you.

STEP 2: Push the SD card in until it makes an audible “click.”
Formatting the Micro-SD Card (Mini 4 Pro)
The process for formatting SD cards that are in the Mini 4 Pro is done within the DJI Fly App, whether you have a DJI RC 2 or the RC-N2 remote controller.
To format the SD card, after powering on both the Mini 4 Pro and your current RC:
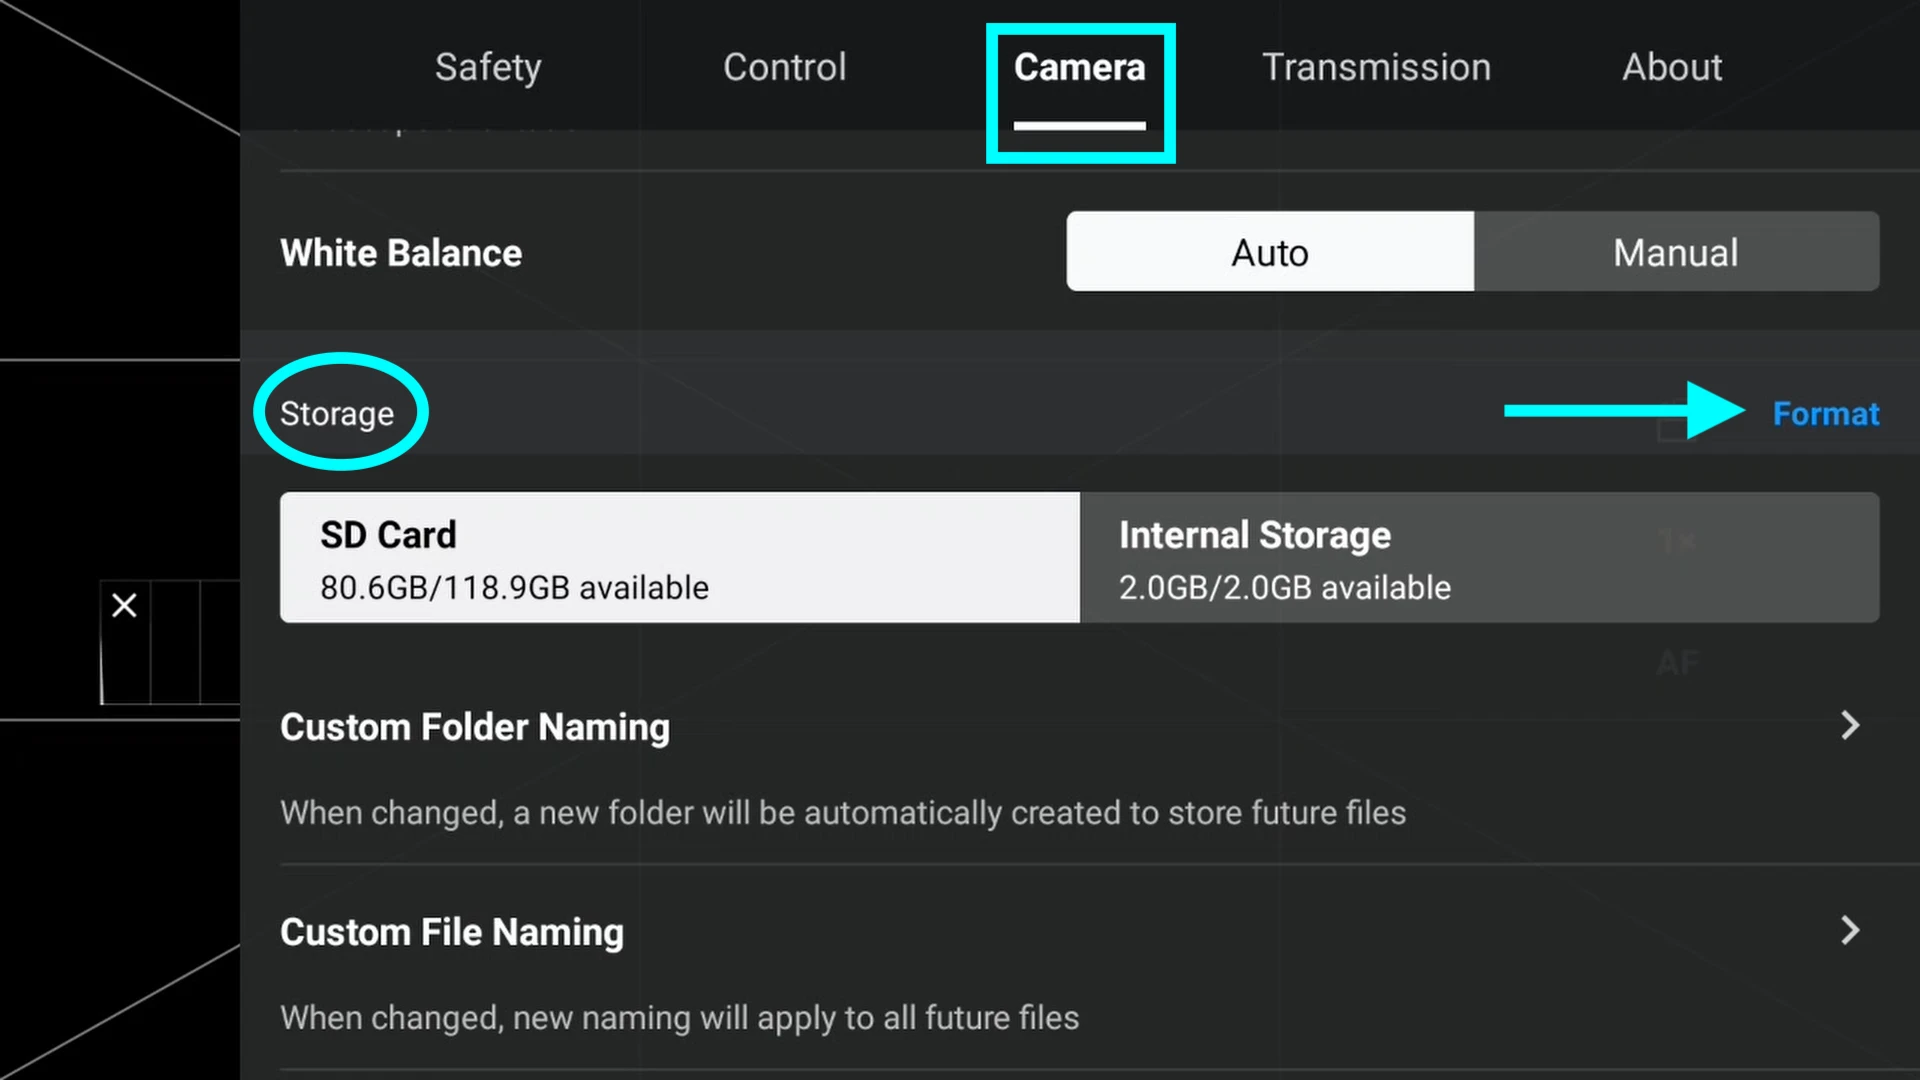
STEP 1: While in the DJI Fly app, go into your settings and locate the CAMERA tab.
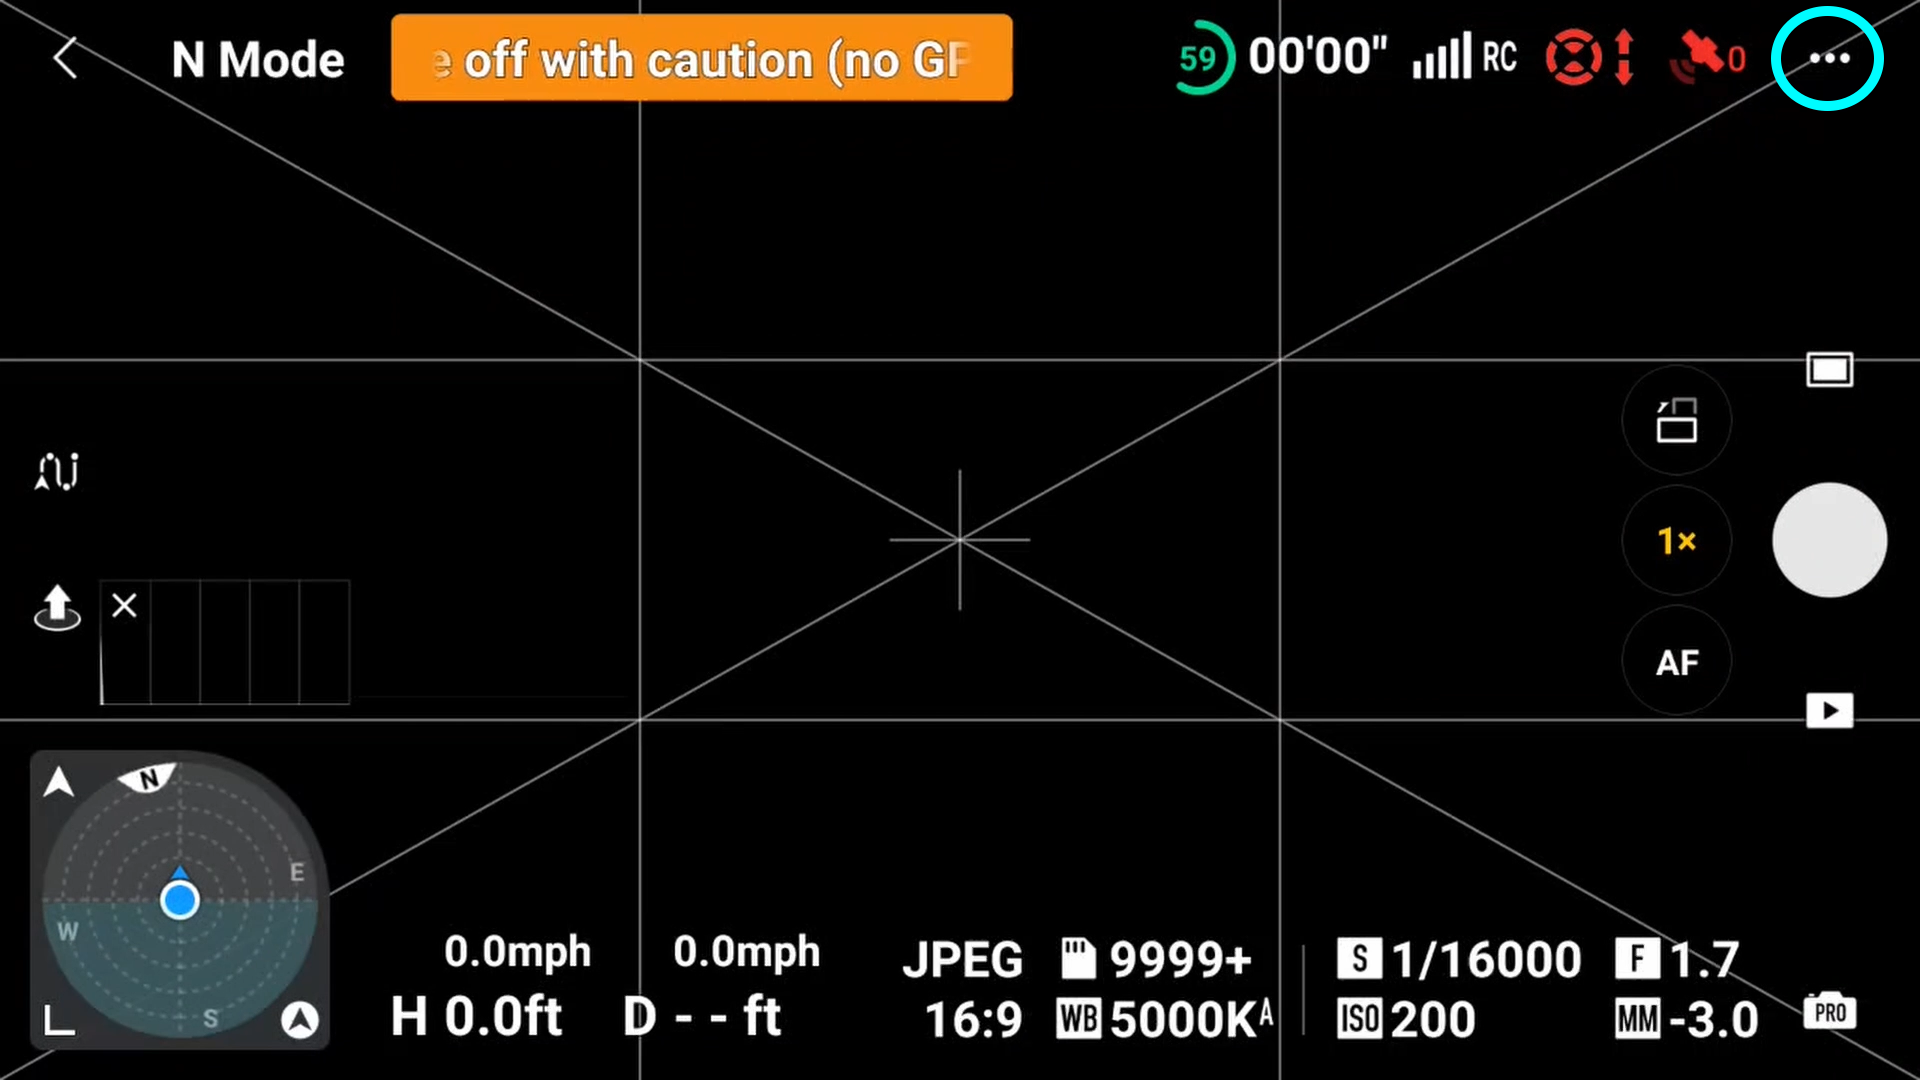


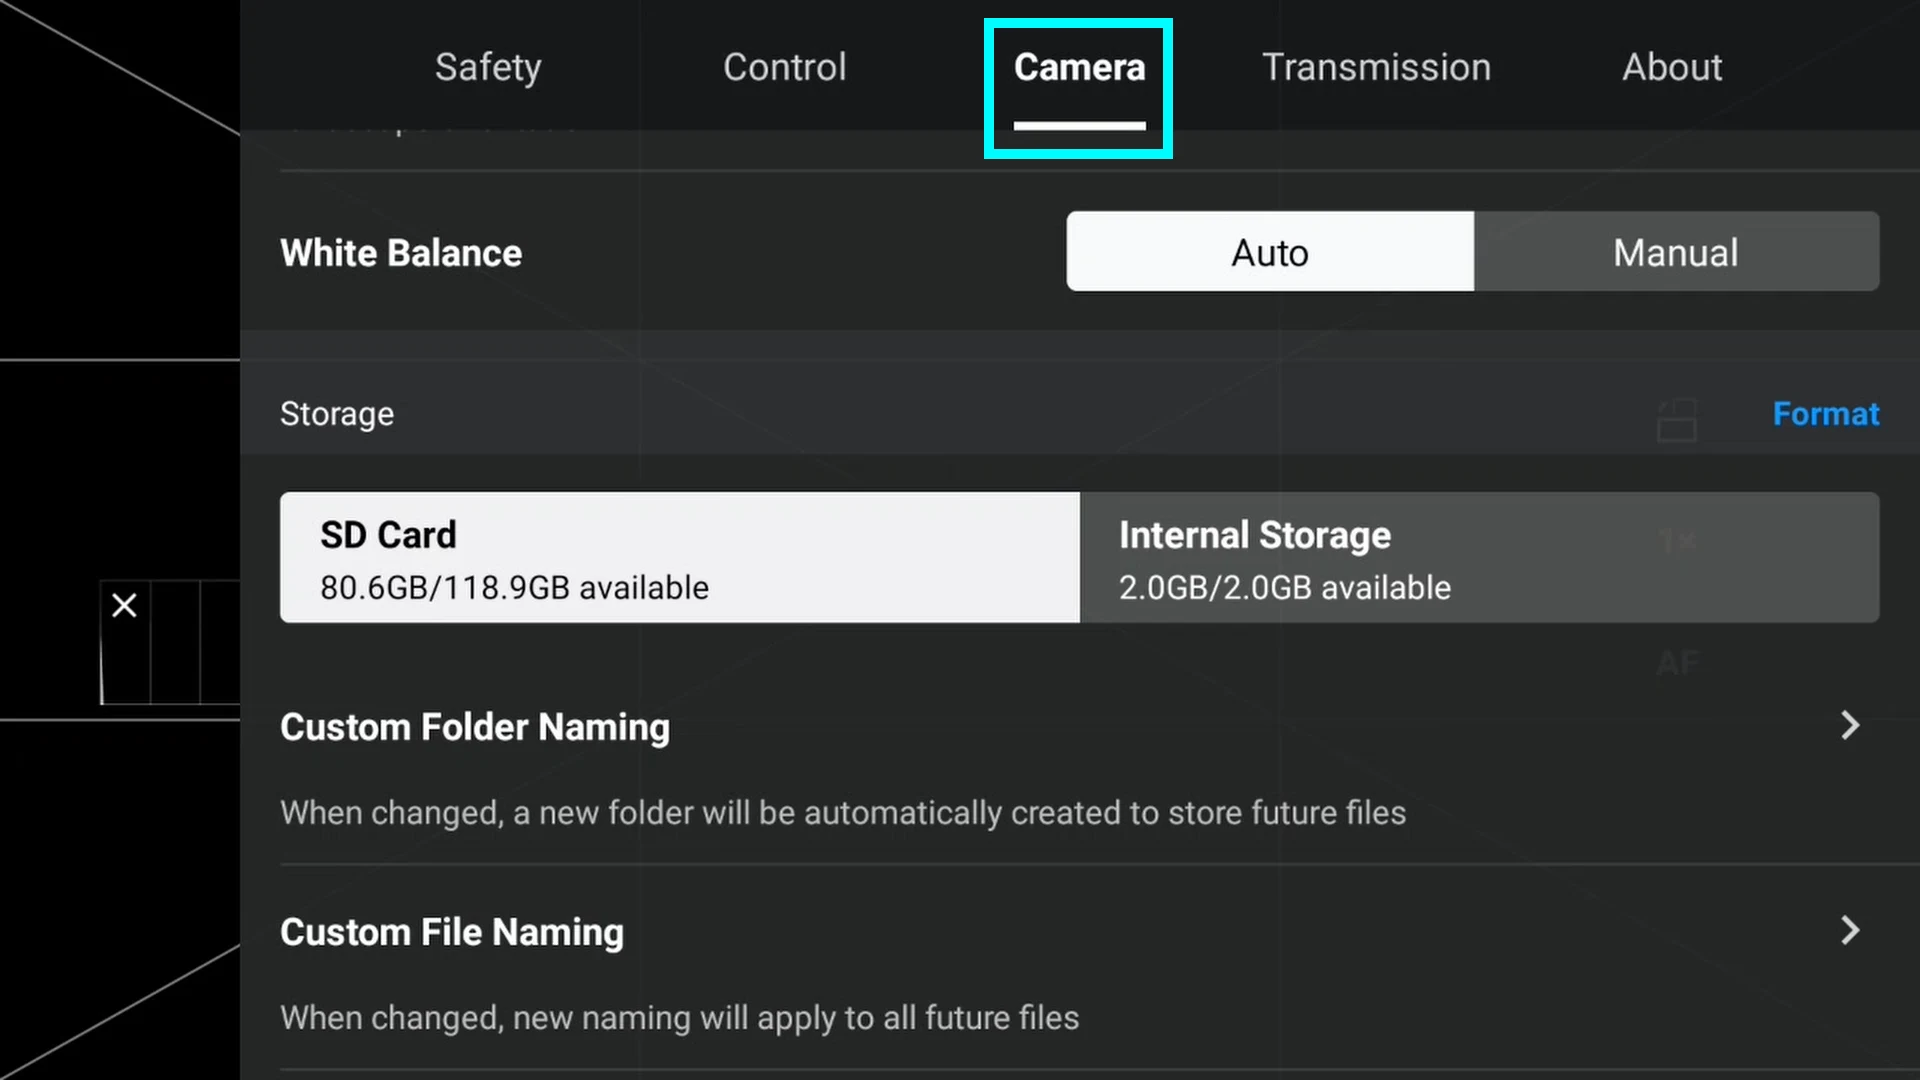
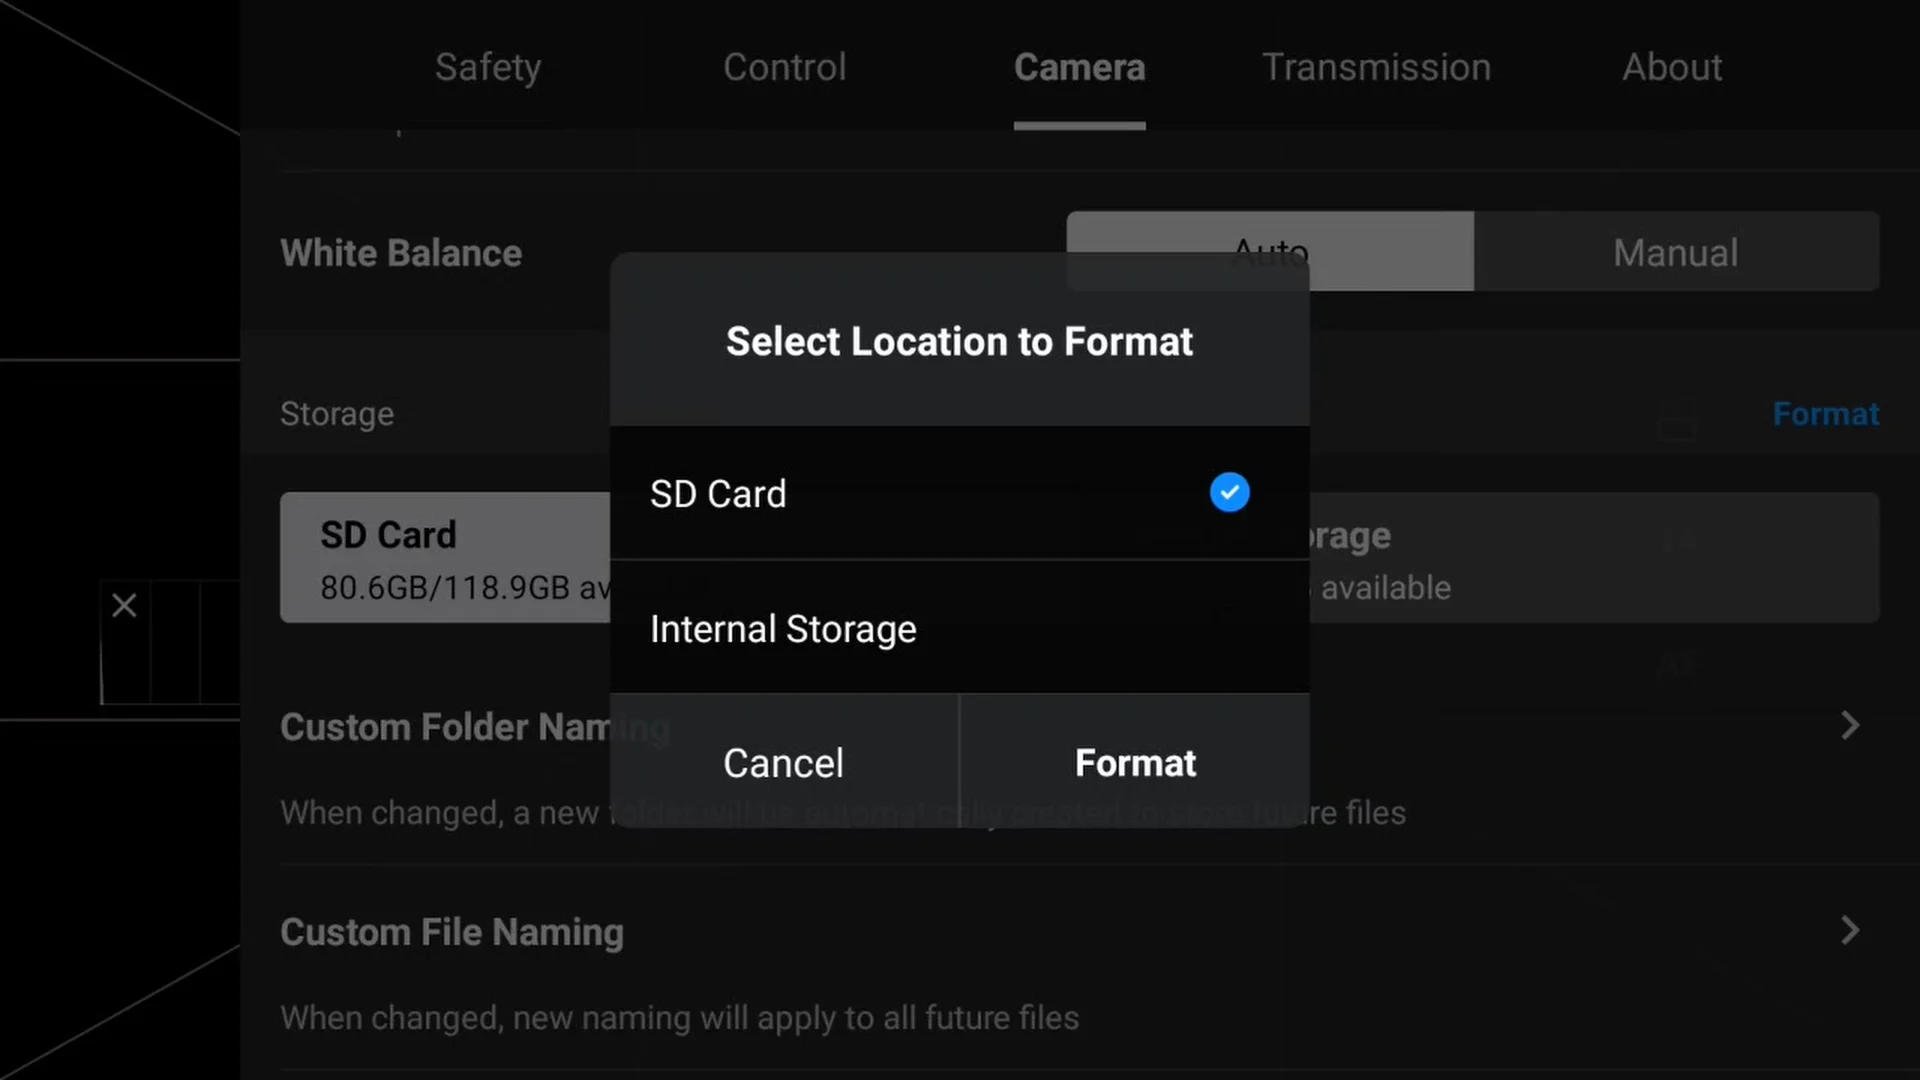
STEP 2: Under storage, press format. You will be presented with an option to format either the SD card or Internal Storage. Choose SD card and press Format.


» MORE: How to Format SD Cards in DJI Drones (Quick Steps with Photos)
Formatting the Micro-SD Card (DJI RC 2)
Unlike formatting the SD card in the Mini 4 Pro, you can format the DJI RC 2’s SD card from any screen while the RC is powered on.
To format the DJI RC 2’s SD card:
STEP 1: Pull down the DJI RC 2’s notification screen by double-swiping down.
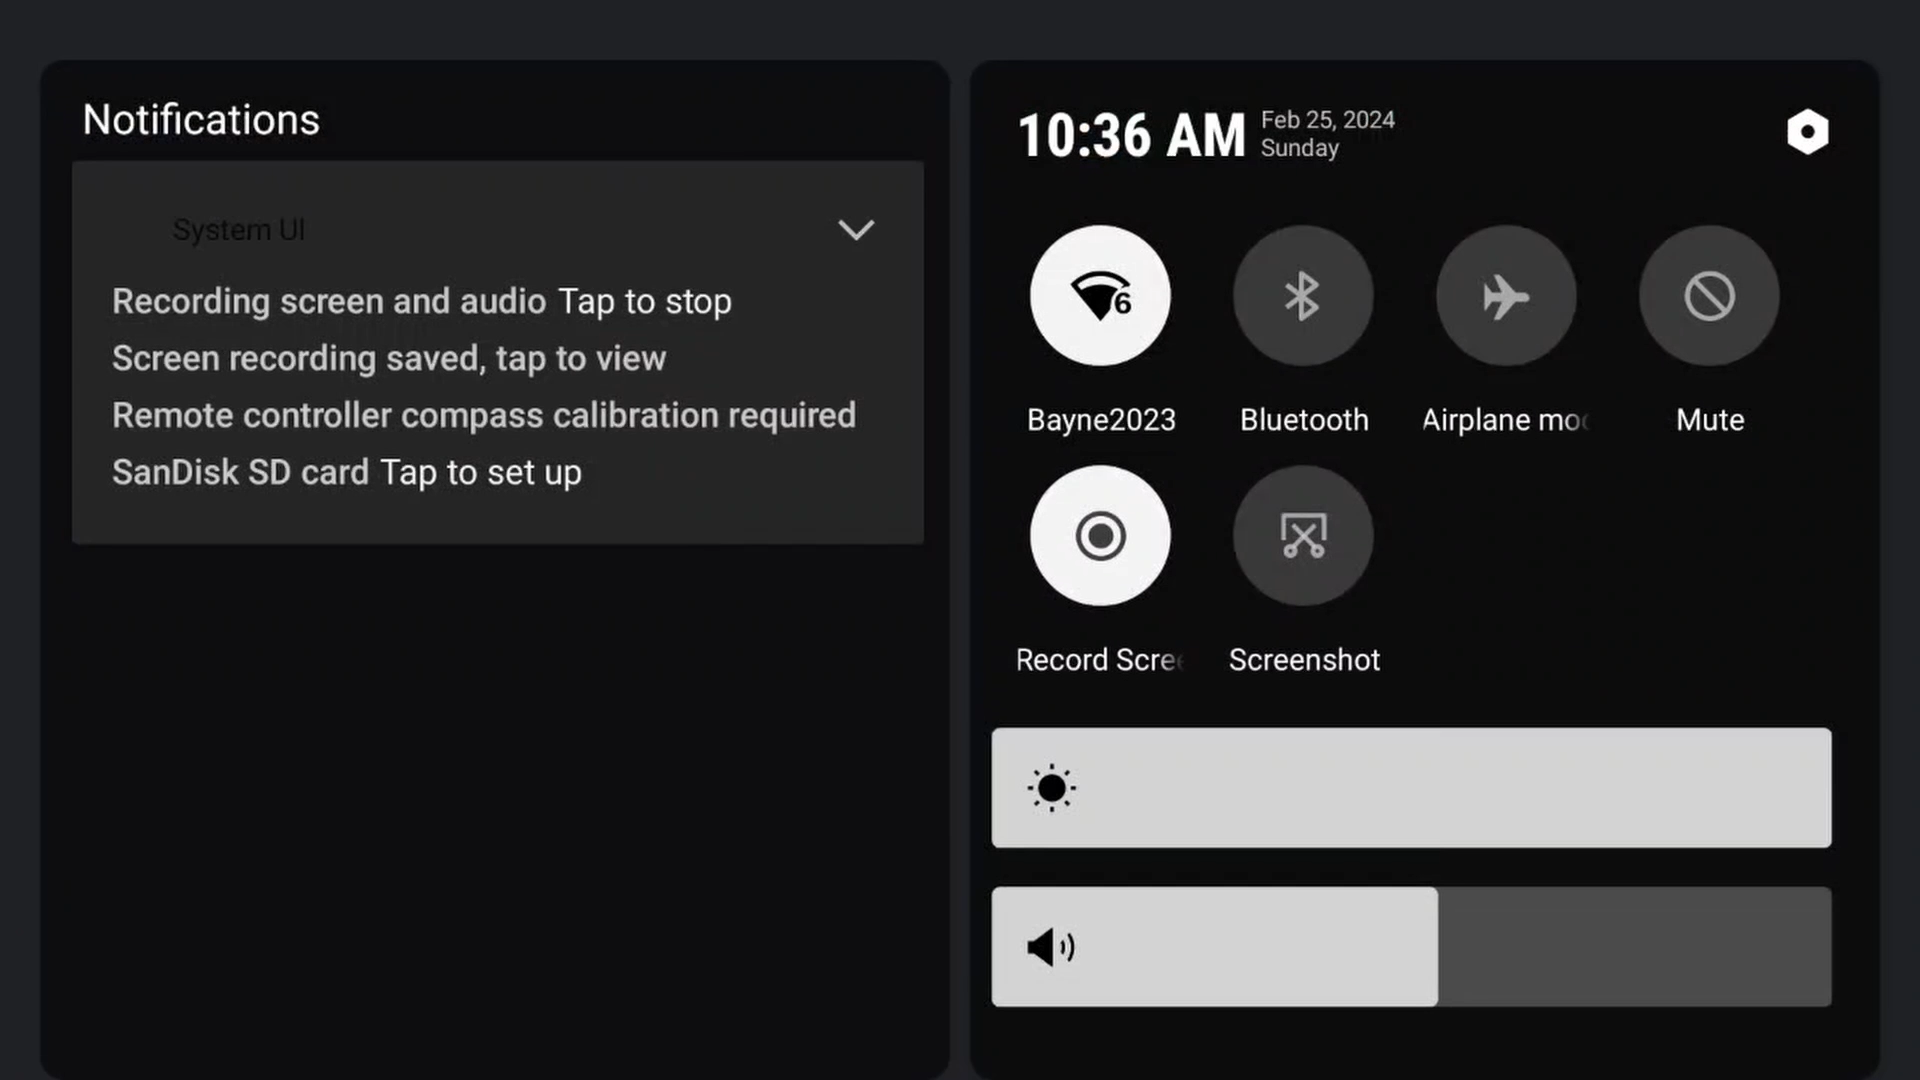
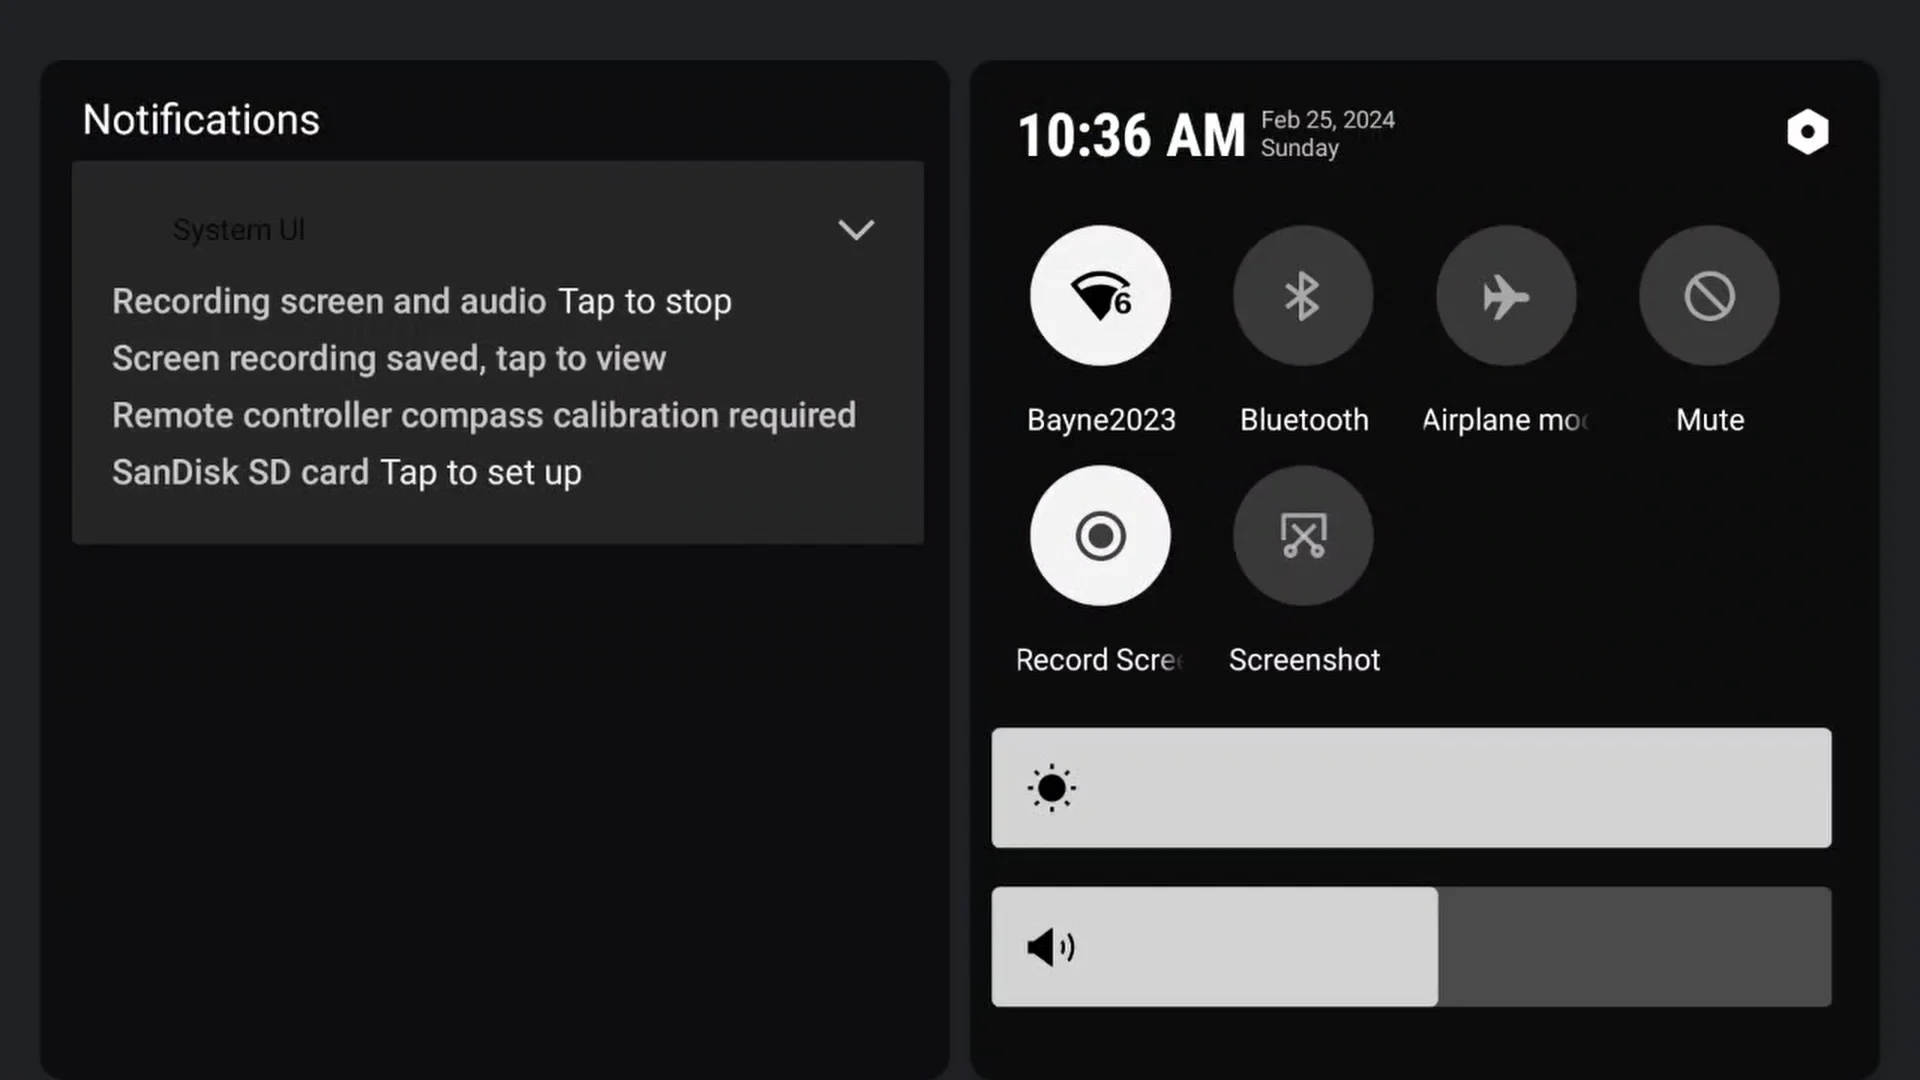
STEP 2: Press the settings/options gear in the upper right-hand corner of the screen.


STEP 3: Tap STORAGE
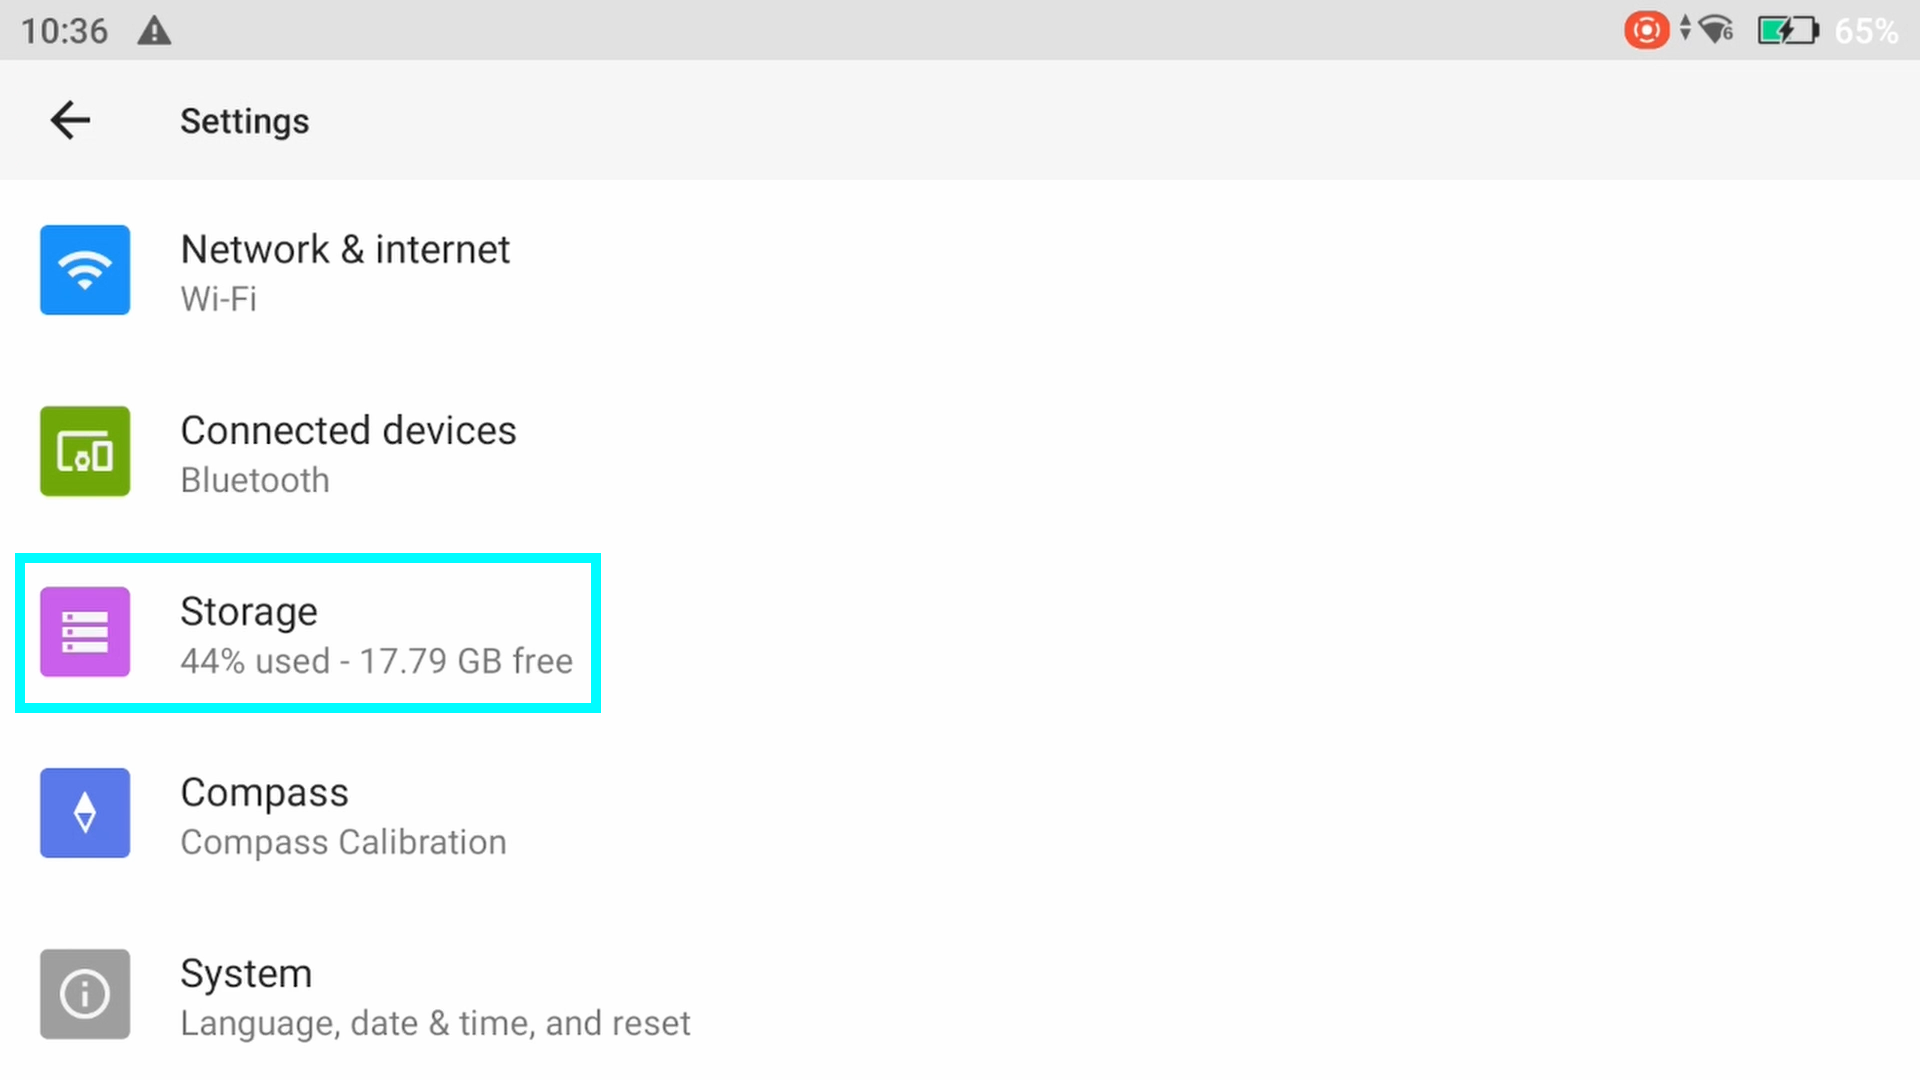

STEP 4: On the bottom of the screen, under Portable Storage, you will see your SD card. Mine is labeled DJIRC2.

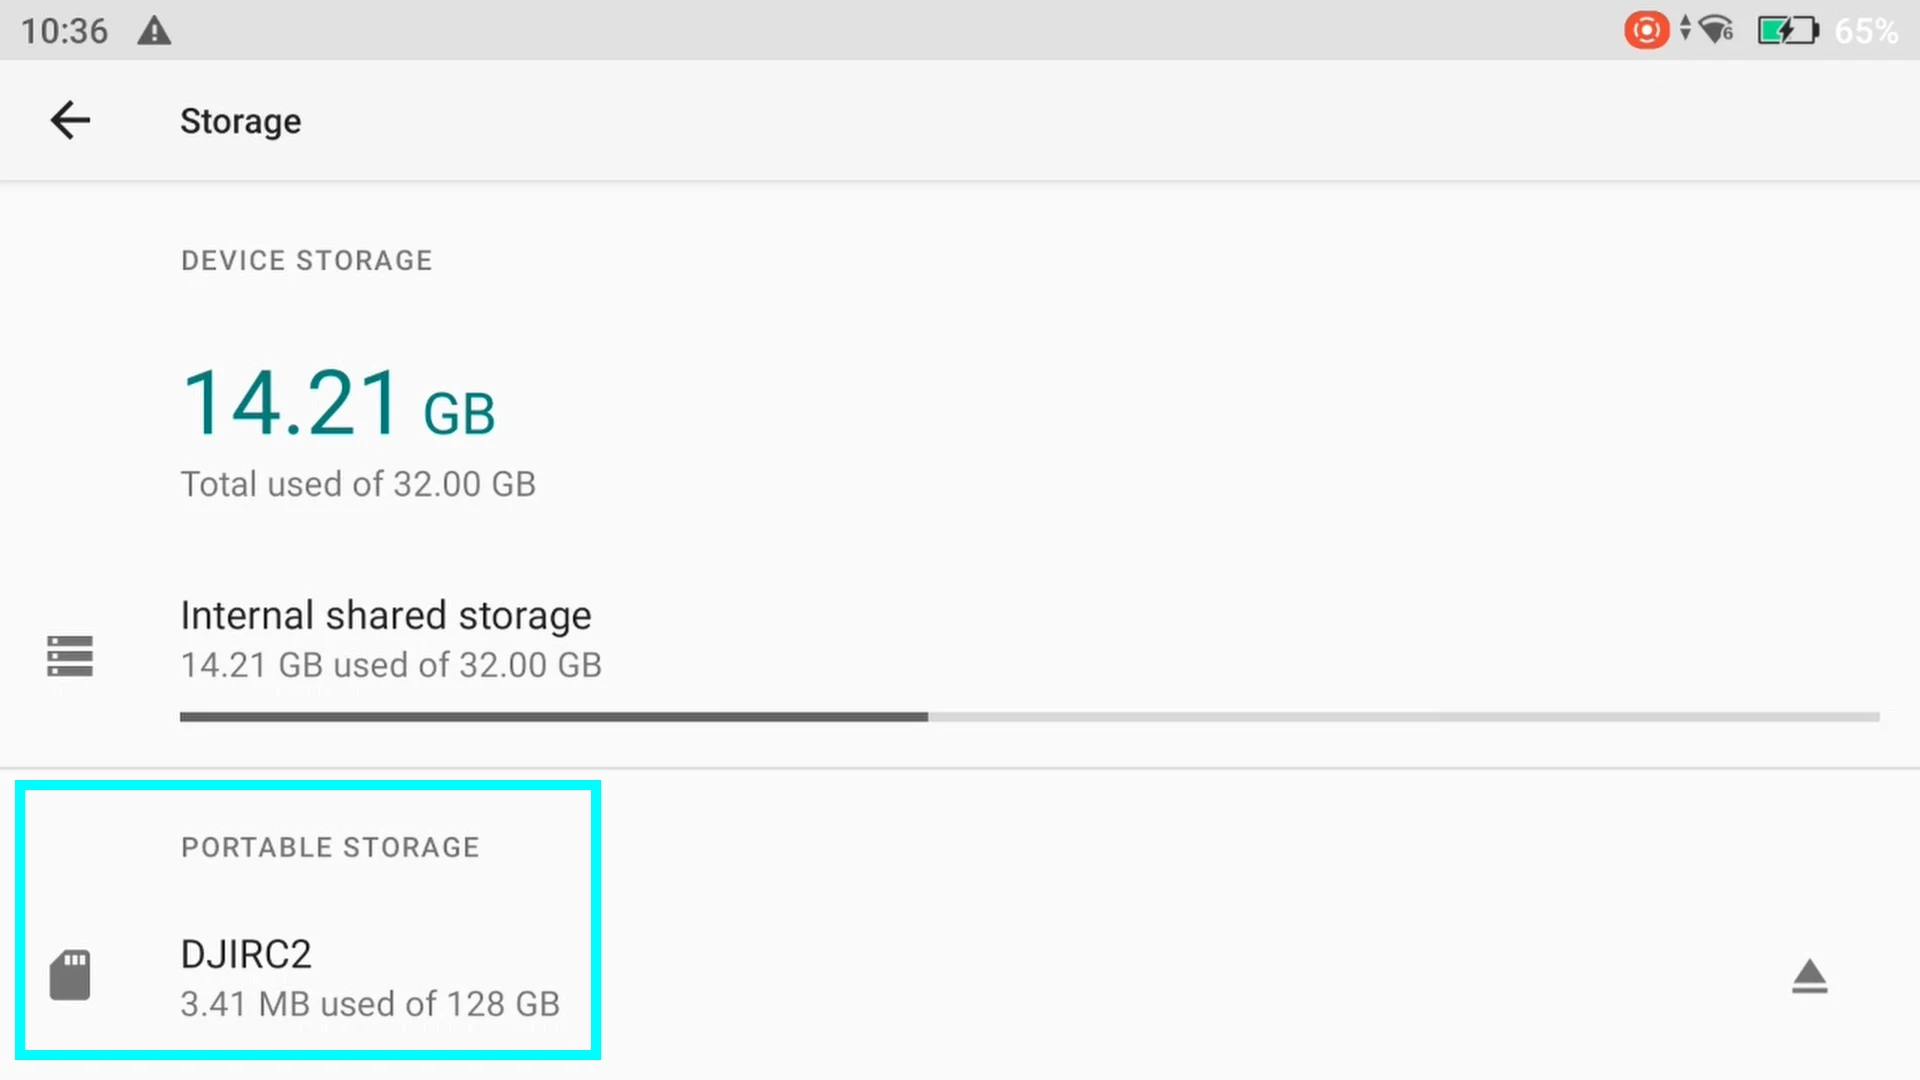
Tap on your SD card’s name. You’ll see your SD card’s used space.
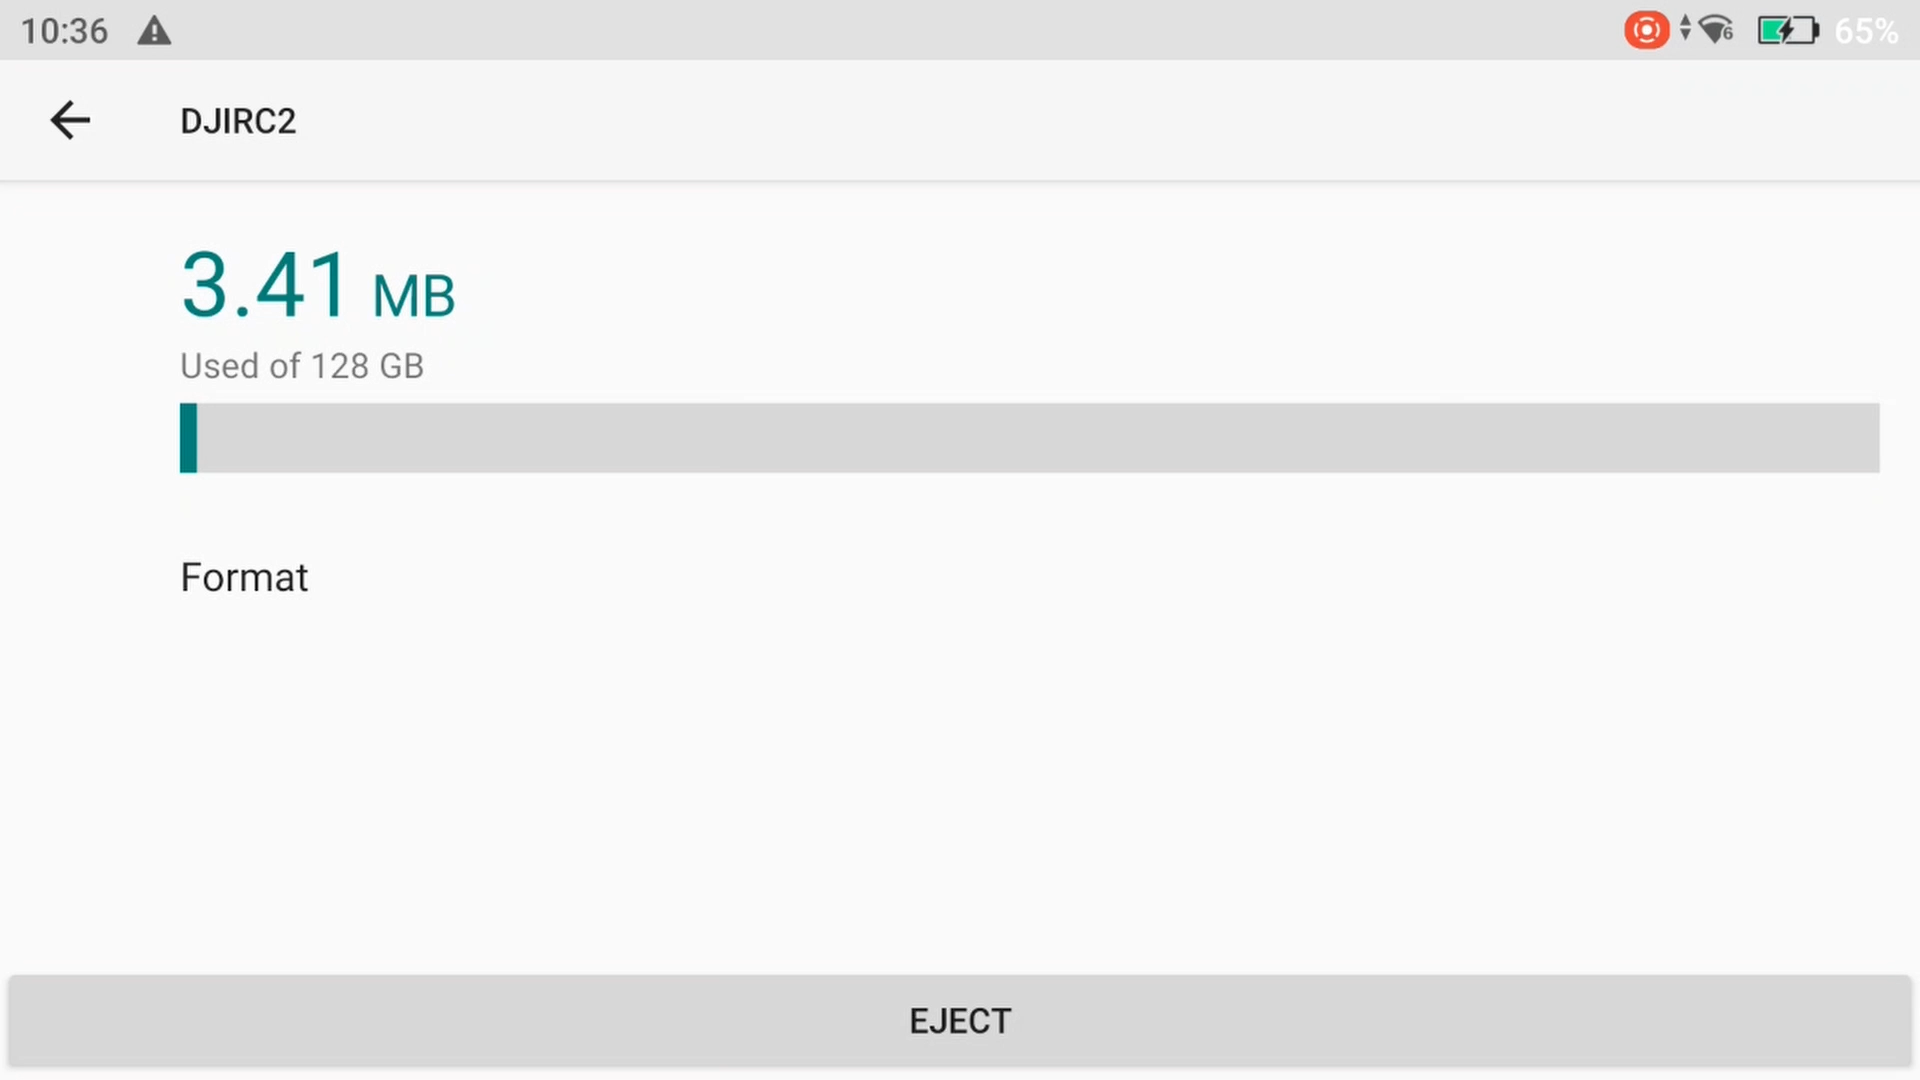
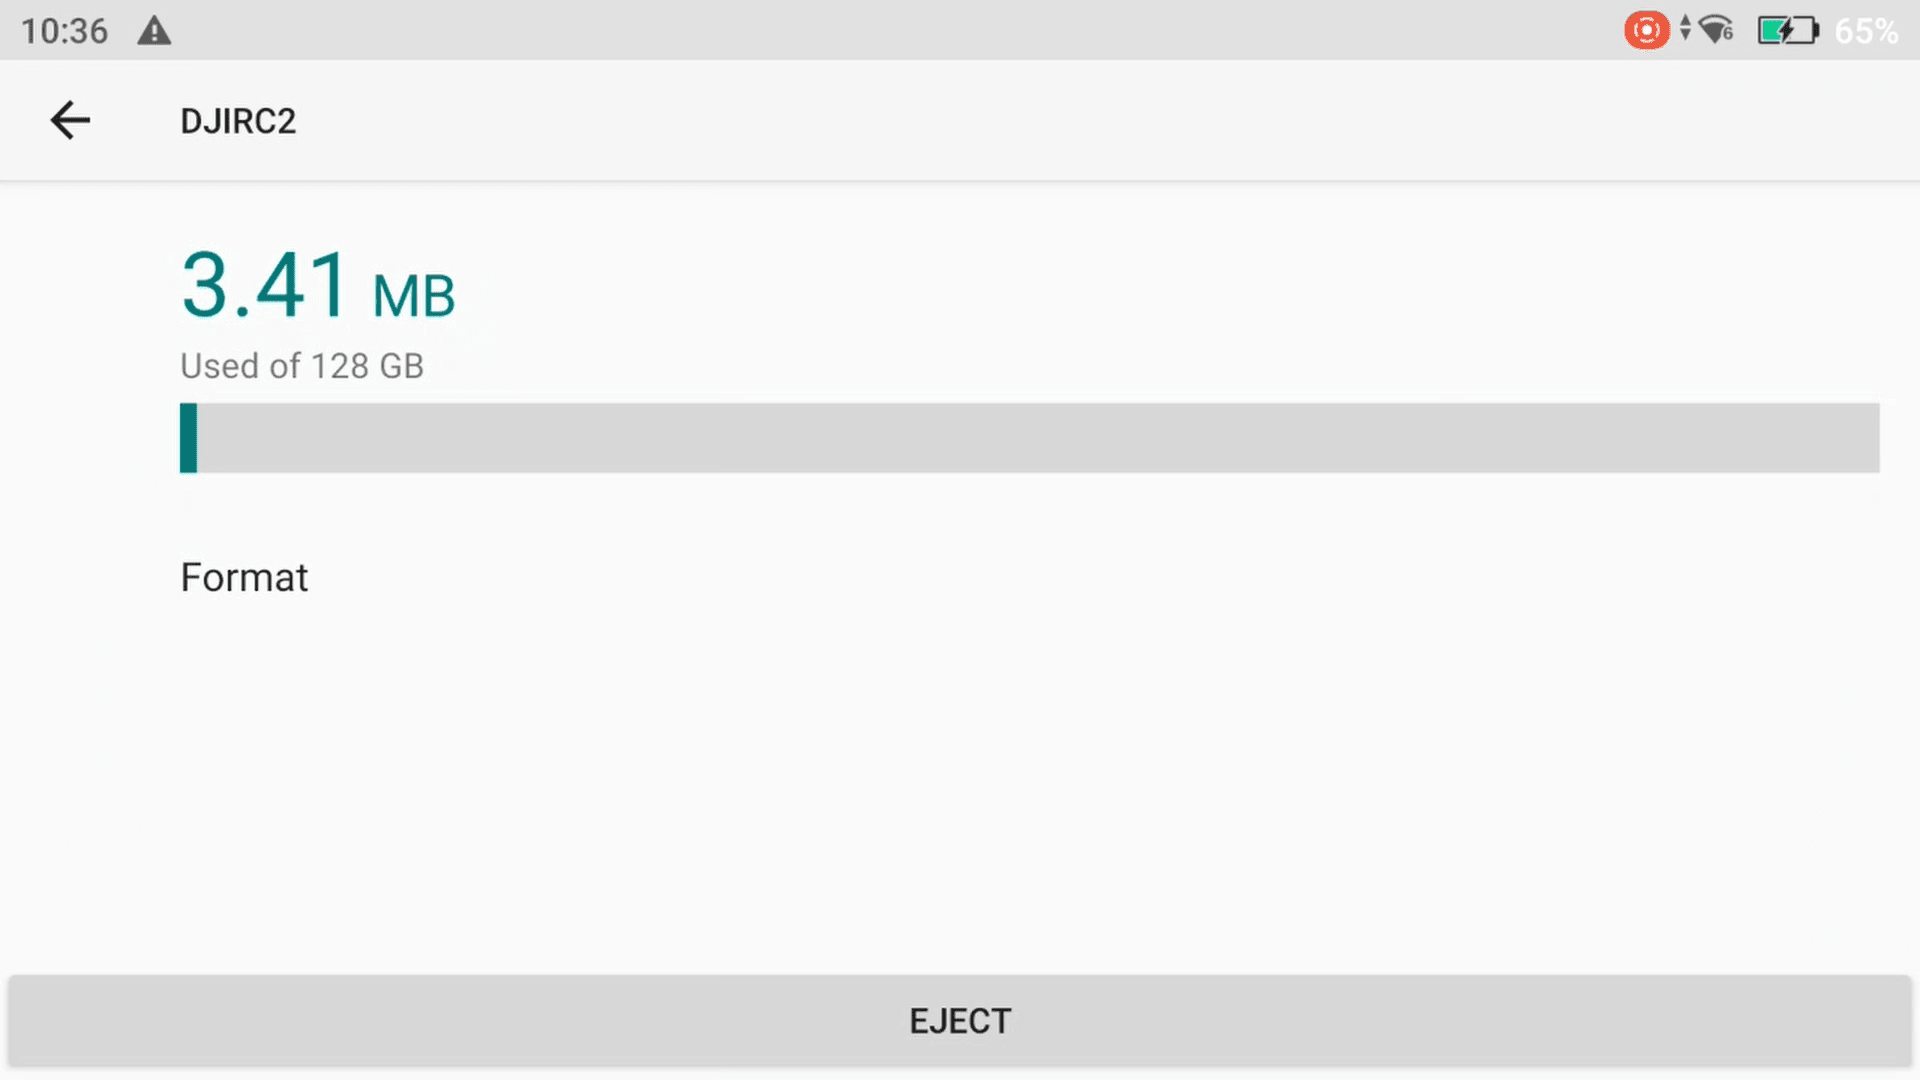
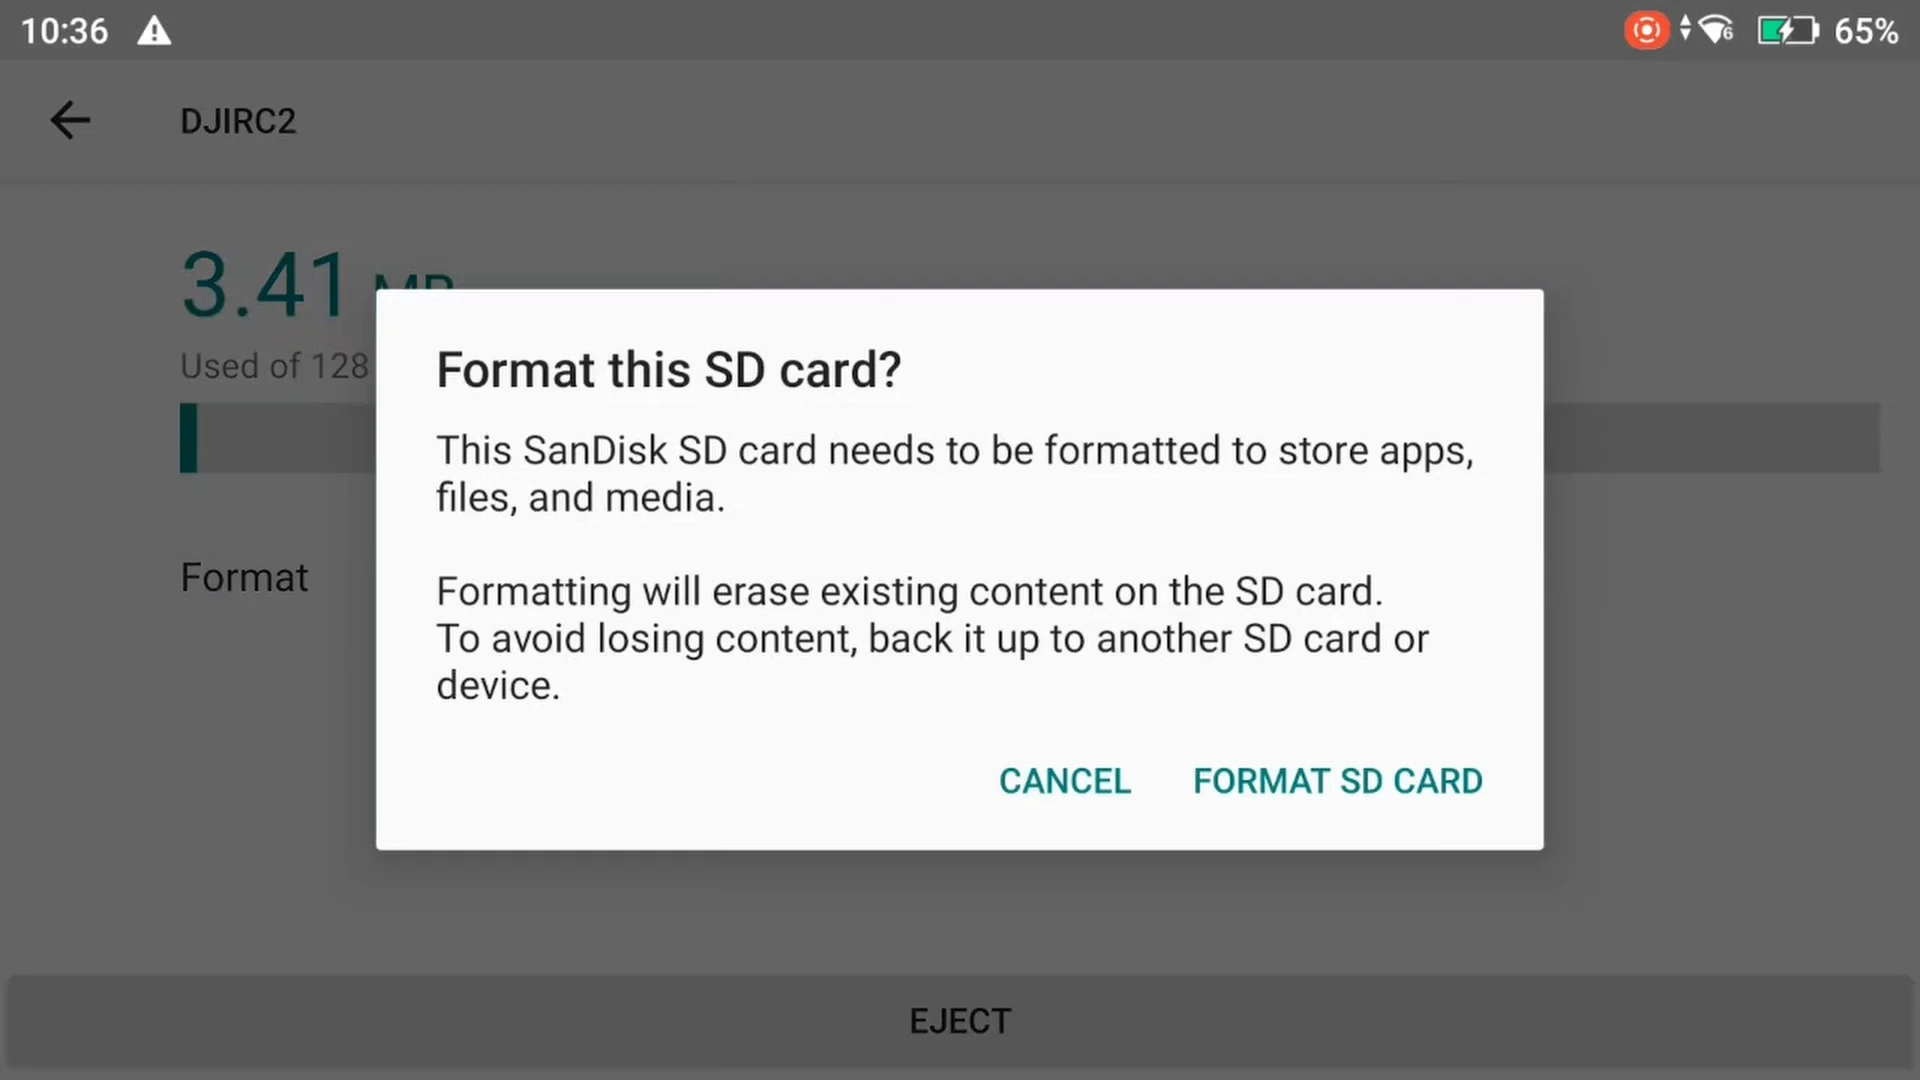
STEP 5: Press Format. You’ll then be asked to format the SD card. If you choose to format at this time, press FORMAT SD CARD or otherwise choose CANCEL

» MORE: DJI RC vs. DJI RC 2 (In-Depth Comparison)
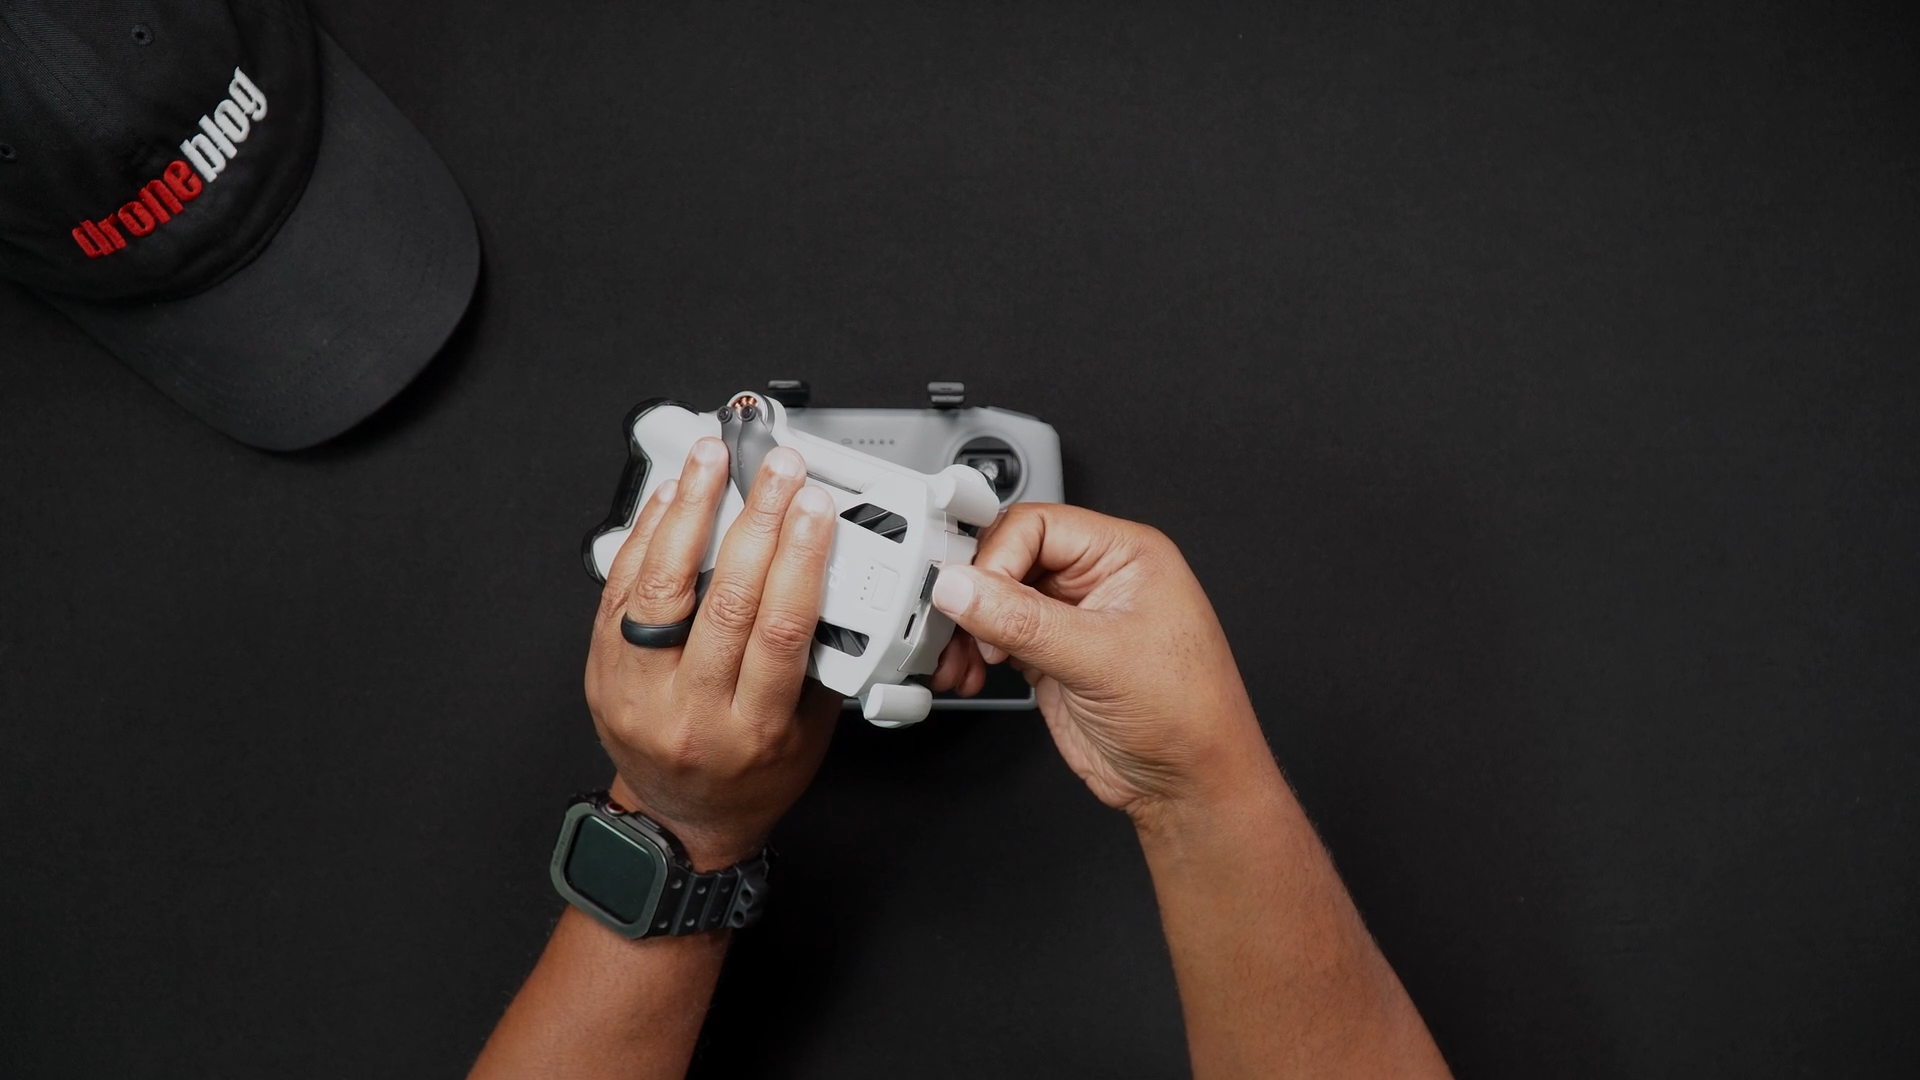
Ejecting the Micro-SD Card
Ejecting the SD card from either the Mini 4 Pro or DJI RC 2 is handled the same.
Caution must be exercised when removing either SD card, as a finger slip can cause the SD card to force-eject unexpectedly.
To eject either the Mini 4 Pro or DJI RC 2 SD card:
- STEP 1: Using a thumbnail, at a slight angle, push the SD card in and then slowly remove your thumb.
- STEP 2: Carefully pull the SD card out.
Tip: If you have larger fingers or find it difficult to remove the SD card, simply attach a piece of scotch tape to the end of the SD card, effectively creating a tab to pull the SD card out.
» MORE: DJI Mini 4 Pro – How to Download Content (Step-By-Step Guide)