
The DJI Air 3 is an excellent choice for those wanting something larger than a Mini 3 Pro, but not quite as large as a Mavic 3.


Like its predecessor the Air 2S, the Air 3 hits the sweet spot between cost and features ratio, offering quite a bang for the buck, while sporting some of DJI’s newest and innovative features.
If you are new to drones in general and the Air 3 is your first drone, we will be going through the steps needed to get you up and running.
We’ll be considering:
- What’s in the various Air 3 combos
- Charging all of the batteries
- Installing the Propellers
- Downloading, Installing, and setting up the DJI Fly Software
- And more
Hopefully, after reading this guide, you, as a new Air 3 owner, will have all of the tools needed to get up in the air safely.

To help, we’ve identified and reviewed the best drone courses for beginners and professionals.

Air 3 Overview
The DJI Air 3, as the successor to the Air 2S, comes complete with dual 1/1.3″ cameras, with focal length equivalents of 24mm and 70mm, respectively.
The 24mm wide angle lens and the medium tele 70mm lens both take excellent photos and shoot videos in identical resolutions.
What has stumped many in the drone community is why DJI decided to use smaller Mini 3 Pro-like camera image sensors (1/1.3″) for the dual camera system as opposed to the larger 1″ sensor found on the Air 2S.


Time will tell, but perhaps this was to improve the overall gimbal functions associated with a lighter dual-camera setup, as there have been quite a few reports of the large gimbal in the Mavic 3 Pro suffering from micro shutters.
Maybe DJI will have a surprise in store with an Air 3S or Pro model in the future, with larger cameras?
With the Air 3 redesign, it is not only a fair bit heavier than the Air 2S but it is slightly taller and longer as well.
For those new to the Air series or drones in general, this might be a moot point, as the Air 3 really travels well in its own shoulder bag (included in the Fly More combo) or in most photography or drone backpacks.
» MORE: Can I Fly DJI Air 3 Without a License (Read This First)


Another important addition to the all-new Air 3 is omnidirectional obstacle sensing.
This feature is important to seasoned drone operators and new pilots alike, as it allows the Air 3 to fly with 360-degree obstacle sensing coverage, making it ideal for complex active track paths and waypoint missions.
It also adds protection for those nervous when flying drones in dense areas.
» MORE: DJI Air 3 vs. Air 2S (Here’s My Choice)
Air 3 Combos
Here at Droneblog, we really like the trend DJI has set and followed in the past few years, releasing their drones with various combos and options that fit into a wide variety of budgets and needs.
The Air 3 is no exception to this rule and comes in three different combos.
With there being so many options to choose from, the question oftentimes asked is if a Fly More combo is really needed, or should someone start off with just the RC-N2 remote controller, the Air 3, and a single battery and go fly.
We tend to side with buying a flymore combo, especially if planning on really using the Air 3 regularly.
To put this into perspective, if planning on buying the Air 3 with the RC-N2 only (the standard remote controller version), and later just adding on two batteries, it would ultimately be cost-effective to purchase an RC-N2 combo initially for less, and get more in the combo.
As of the writing of this article two Air 3 batteries, cost about USD $320 combined.
That now puts the Air 3 with RC-N2 and 3 batteries (2 bought later) at approximately $1400. The RC-N2 Fly More combo is selling at $1349.
If you want the shoulder bag and battery charging hub (which we recommend), that is an additional $60 for the bag and $100 for the hub, putting this piece-mail price close to $1560.
You can see where we are going with this.
In our opinion, if possible, go with either Fly More combo initially, as you’ll save quite a few dollars doing so.
If not able to, then the Air 3, RC-N2, and one battery combo will get you up in the air for a fair amount of time.
» MORE: DJI Air 3 vs. Mini 3 Pro (Here’s My Choice)
Air 3 DJI RC2 Fly More Combo

DJI Air 3 Fly More Combo with DJI RC 2 (screen remote controller), Drone with Medium Tele & Wide-Angle Dual Primary Cameras for Adults 4K HDR, 46-Min Max Flight Time, 48MP, Two Extra Batteries.
Includes:
- DJI Air 3
- DJI RC2 Remote Controller
- 3 x Intelligent Flight Battery
- 3-Battery Charging Hub
- Shoulder Bag
- USB-C Cable
- Front Sensor and Gimbal guard
- 8 Spare Props
- Connection Cables
Air 3 RC-N2 Fly More Combo

DJI Air 3 Fly More Combo with DJI RC-N2 Remote Controller, Drone with Camera for Adults 4K HDR, Medium Tele & Wide-Angle Dual Primary Cameras, 46-Min Max Flight Time, 48MP, Two Extra Batteries
Includes:
- DJI Air 3
- DJI RC-N2 Remote Controller
- 3 x Intelligent Flight Battery
- 3-Battery Charging Hub
- Shoulder Bag
- USB-C Cable
- Front Sensor and Gimbal guard
- 8 Spare Props
- Connection Cables
Air 3 Standard RC-N2 Combo
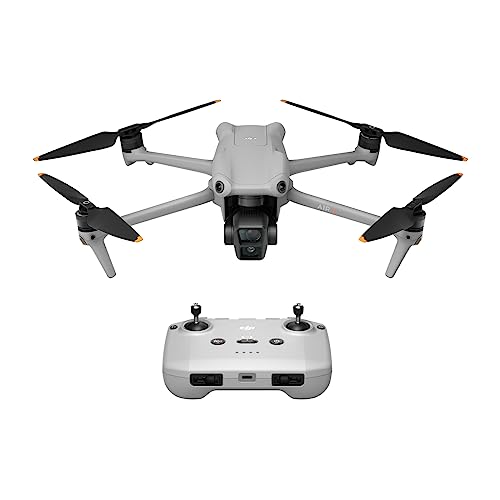
- Tele & Wide-Angle Dual Primary Cameras
- 46-Min Max Flight Time
- Omnidirectional Obstacle Sensing
- 48MP Photos, 4K/60fps HDR, up to 20Km Video Transmission
Includes:
- DJI Air 3
- DJI RC-N2 Remote Controller
- 1 x Intelligent Flight Battery
- USB-C Cable
- Front Sensor and Gimbal guard
- 2 Spare Props
- Connection Cables
Battery Charging
The Air 3 boasts 46-minute flight times, which is quite a feat for a drone of this size. When adding three batteries into the mix, the Air 3 stays in the air for quite a while.
In real-world usage, landing around the 25% mark, I consistently get 33 minutes or so of flight, pushing the time to an hour and a half on three batteries, without even using the power transfer feature (more on this soon).
If you have opted to go with the Air 3 and DI RC-N2 only, the one included Air 3 battery can be charged without using a 3-battery charging hub and will get you a decent amount of flight time.
» MORE: Drone Battery Care (All You Need to Know)
DJI Air 3 Flight Batteries
When you unpack the Air 3 batteries, there will be some charge in them.
Although excited and tempted to fly the drone immediately, it is best to fully charge all of the batteries that come in the combo first, whether the single battery option or the three batteries in the Fly More combo.
To charge a battery within the Air 3:
Step 1: Open the USB-C and SD card port at the back of the Air 3.


Step 2: While the Air 3 is off, plug the USB-C side of the included USB-C cable into the rear of the Air 3.
Step 3: Plug the USB end into any 65-watt charger (not included, recommendation below).


To charge batteries in the charging hub:
Step 1: Insert all three Air 3 batteries into the charging hub.
Step 2: Insert the USB-C end of the included USB-C cable into the charging hub.


Step 3: Insert the USB end into either a 65-watt charger or a 100-watt PD charger (not included, recommendation below).
Note: If you already have a 65-watt charger, that will work, however, a 100-watt PD charger will charge all of the batteries faster.
Step 4: Connect your DJI Remote Controller to your 65 or 100-watt charger to charge.
You are able to check the charge of each individual battery by single-pressing the power button on the battery.
Likewise, when you insert all three batteries into the charging hub, the LED lights will alert you to how much power is in all three of the batteries.
As mentioned previously, there is an option that allows power from the remaining batteries to be transferred to a single battery with the most battery life.
» MORE: DJI Air 3 vs. Mavic 3 (Here’s my Choice)
To use the power transfer feature (Accumulating Power Mode):
Step 1: Insert all three batteries into the unplugged battery hub.
Step 2: Press and hold the black function button until the LED indicator changes from yellow and blinks green.


Step 3: To stop the power accumulation function, simply press and hold the Function button until the LED status turns yellow.
Again, the remaining power from multiple batteries will transfer to the battery with the highest remaining power.
So, Instead of having 3 partially powered batteries, you can now have one fully, or close to a fully, charged battery for your next flight.

Compatibility:
- DJI Air 3
- DJI Mavic 3 Pro, DJI Mavic 3/Classic
- DJI Avata, and More

- For iPad iPhone 14 13 12 11 Pro Max
- Pixel
- Galaxy Series
- Drones and More
Remote Controller (DJI RC2 & RC-N2)
The DJI RC2 is similar in design to the original DJI RC, while the RC-N2 is pretty much identical to the RC-N1.
The difference between the Air 3’s newer remote controllers to previous versions is the usage of the new video transmission, O4 or OcuSync 4.0.
Because of the new transmission system, two additional antennas have been added to the DJI RC2 which now has two external rabbit ear antennas, in addition to the two internal antennas.
The RC-N2 now has 2 antennas. One in the remote controller and one in the retractable external integrated smartphone holder and antenna.
Like the Air 3 batteries, the batteries in the DJI RC2 or RC-N2 may have some charge in them when initially unboxed.
Although this might be the case, once again it is important to charge the remote controller batteries fully before first-time usage.
As has become the norm with DJI, the Air 3 does not include a power adaptor, but does include a single USB-C cable.
For the quickest charging speeds, it is recommended you purchase a 65-watt or, better yet, 100-watt PD Charger for the Air 3 flight batteries.
With a 65 or 100-watt charger, you will also be able to charge a remote controller while charging the Air 3’s batteries.
» MORE: 27 Best Drone Accessories (I Can’t Live Without)
To charge the DJI RC-N2:
Step 1: Insert the USB-C end of the included USB-C cable into the USB-C port on the bottom of the RC-N2.


Step 2: Plug the standard USB end into your 65 or 100-watt PD charger.
The LED indicator lights on the face of the remote controller will flow and blink to signal charging.
To charge the DJI RC2:
Step 1: Insert the USB-C end of the included USB-C cable into the USB-C port on the bottom right of the DJI RC2.


Step 2: Plug the standard USB end into your 65 or 100-watt PD charger.
The LED indicator lights on the face of the remote controller will flow and blink to signal charging.
Propellers/Installing
Although slightly larger in size than the Ari 2S that it upgrades, the Air 3, with its larger propellers is actually quieter on the ground and in the air than the Air 2S.


This may be due to either the pitch the props produce or the newer design.
This is appreciated by those who tend to fly in more populated areas, as well as those new to flying who may be a bit cautious when flying near people.
Like the Air and Mavic series, the drone propellers have a spring-loaded push and twist mechanism, which is more convenient than the screw method the Mini series uses.
When looking closely at the Air 3 propellers you will see that there are two different colored props represented: those that are solid black around the base, and those that have a gray ring around the base.
These two propeller colors likewise correspond to the motors on the Air 3. The black props go with the black motors and the gray with the gray.
If you put the wrong propeller on the wrong motor, the drone will either give a “change propeller” error message and refuse to lift off or may get a few feet in the air and crash.
It is imperative to put the correct props on the correct motors.
» MORE: Best Drone Propellers For Every Purpose (Complete Guide)
To install the propellers:
Step 1: Unfold the arms and legs on the Air 3.
Step 2: Find the propeller base color that matches the motor color you will be installing the prop on.


Step 3: Fit the propeller onto the motor, then, pinching the motor with your index finger and thumb, push and twist the propeller on.
Depending on the motor, this motion will either be clockwise or counterclockwise.


» MORE: How Long Drone Propellers Last?
SD Card
If you’ve purchased either the standard Air 3 kit with the RC-N2 controller, or with the DJI RC2, an SD card will eventually be needed if you want to record 4k videos or take 48MP photos.
The Air 3 does not include an SD card, however, below is a list of DJI-recommended SD cards that we likewise like and recommend, along with information for these cards:
» MORE: How to Format SD Cards in DJI Drones (Quick Steps with Photos)
SanDisk Extreme/Pro Lines
The SanDisk Extreme and Extreme Pro lines are made for the conditions we might find our drones in. They are reportedly Temperature proof, Waterproof, and Shockproof.
The Extreme series has read speeds up to 160MB and write speeds up to 60MB, perfect for 4k video recording and burst shooting on the Air 3.
These features apply to the 128 & 256 GB versions as well.
As regular users of SanDisk, we highly recommend these lines of cards.

- Write Speeds of up to 140MB/s: Capture fast-action photos or shoot 4K UHD video with write speeds of up to 140MB/s.
- Load Apps Faster with A2
- This card is shockproof, temperature-proof, waterproof, and X-ray-proof